Sony Venice
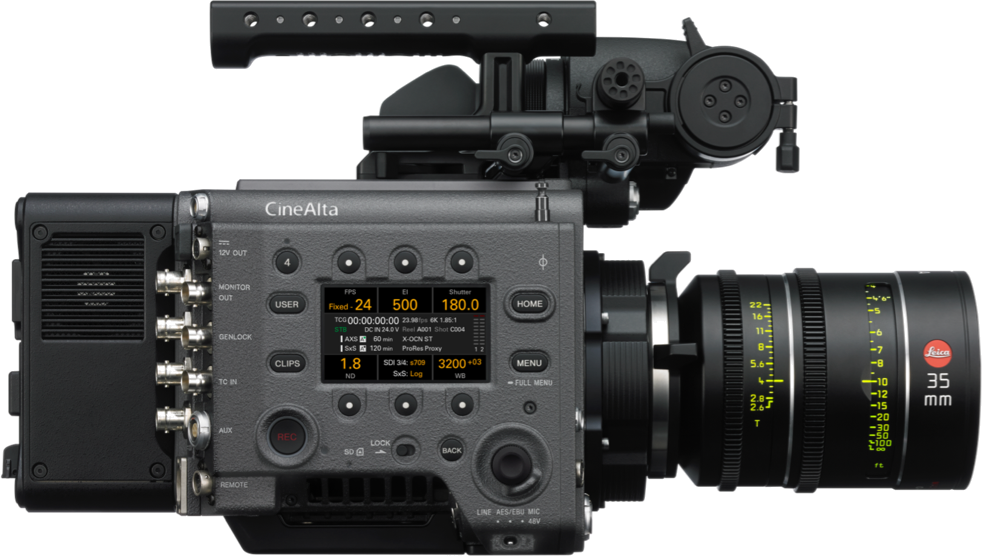
The Sony Venice is a large-sensor cinema camera available in two generations (Venice 1 and Venice 2). It can be controlled by the Cyanview RCP over IP or via the 8-pin remote serial port, depending on the production workflow. Typical use cases include multicam live production, broadcast drama, and remote or wireless camera control via a RIO.
Supported Models
- Sony Venice 1
- Sony Venice 2
Protocol Selection
The Venice supports two control modes:
- Sony Venice IP — Controls the camera over Ethernet. Best for S-Log-based workflows where the RCP paint mode is not required. Gain is expressed in ISO and only affects the SDI output.
- Sony Venice Serial — Controls the camera over the 8-pin remote connector. Required for full RCP paint mode operation (Black balance, advanced shading, tally, etc.).
The two modes are mutually exclusive. The RM / RCP Paint Con setting in Technical > Special Configuration on the camera must be set to Off for IP mode and On for Serial mode.
Supported Controls
| Control | Notes | Venice IP | Venice Serial |
|---|---|---|---|
| Iris | ✔ | ✔ | |
| ISO / Gain | IP: ISO only, affects SDI output only; Serial: dB, 3 dB steps | ✔ | ✔ |
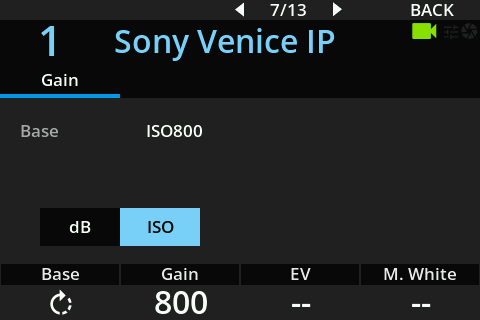
| Base ISO | 800 or 3200 — IP mode only | ✔ | — |
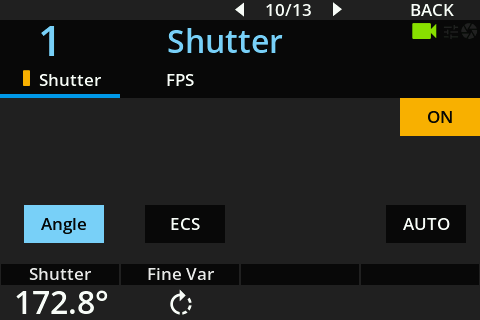
| Shutter | Angle/speed/ECS — IP mode | ✔ | ✔ |
| ND Filter | Presets only | ✔ | ✔ |
| White Balance | Colour temp, tint, AWB — IP; R/B and colour temp only in Serial (no tint) | ✔ | ✔ |
| Black Balance | R/B and Master | — | ✔ |
| Advanced Shading | Flare, Detail, Matrix, Multi Matrix | — | ✔ |
| Record | Start / stop | ✔ | ✔ |
| Tally | Serial only — RED tally, only when not recording | — | ✔ |
| Other Controls | APR, pattern, flip H/V, replay, User Keys, TC | ✔ | — |
| Lens — Zoom / Focus | IP: speed (position displayed only) | ✔ | — |
Connection
The Venice can be connected in four configurations:
- Venice IP (LAN) — RCP connects directly to the camera over Ethernet (or through an Ethernet switch or fiber extender such as Ereca CAM Racer).
- Venice Serial (LAN) — CI0 or RIO connects to the camera's 8-pin remote port; RCP connects to the CI0/RIO over Ethernet.
- Venice IP (Wireless) — RCP connects to the internet; a RIO connects to the camera over Ethernet and communicates with the RCP over 4G, RF, or Wi-Fi.
- Venice Serial (Wireless) — RCP connects to the internet; a RIO connects to the camera's 8-pin remote port and communicates with the RCP over 4G, RF, or Wi-Fi.
Venice IP (LAN)

- RCP powered by PoE or 12 V PSU
- RCP talks directly to camera over IP
Can work through a simple Ethernet switch or fiber like Ereca CAM Racer.
Venice Serial (LAN)

- RCP powered by PoE or 12 V PSU
- CI0 or RIO powered by the camera via the cable (no D-TAP required)
- Cable: CY-CBL-SONY-8P-03 (controls the camera and powers the CI0/RIO)
Can work through a simple Ethernet switch or fiber like Ereca CAM Racer.
Placing the CI0/RIO on the camera side keeps the camera connection clean; placing it on the RCP side allows the serial signal to run through Ereca (trade-off: loses RIO flexibility for external motors/lens control).
Venice IP (Wireless)

- RCP powered by PoE or 12 V PSU, connected to internet
- RIO powered by D-TAP
- RIO connected to camera via Ethernet
- RCP talks to RIO over internet (4G, RF, Wi-Fi, etc.)
Video transport is handled separately (HF link). Cyanview only handles the camera control telemetry.
Venice Serial (Wireless)

- RCP powered by PoE or 12 V PSU, connected to internet
- RIO powered by D-TAP
- RIO connected to camera via CY-CBL-SONY-8P-03
- RCP talks to RIO over internet (4G, RF, Wi-Fi, etc.)
Video transport is handled separately (HF link). Cyanview only handles the camera control telemetry.
Required Accessories
Required (Serial mode):
- CY-CBL-SONY-8P-03 — CI0 / RIO to Venice 8-pin remote port; also powers the CI0/RIO from the camera
Optional:
- Ethernet switch or fiber extender (e.g. Ereca CAM Racer) — for longer cable runs
Configuration
Camera Configuration
Venice IP
In Technical > Network > Setting:
- Set
SettingtoLAN - In the
LANsubmenu:- Set
DHCPtoOff - Set
IP Addressto desired camera IP (e.g.10.192.10.100) - Set
Subnet Maskto desired subnet (e.g.255.255.0.0)
- Set
In Technical > Authentication:
- Set
UsernameandPassword
In Technical > Special Configuration:
- Set
RM / RCP Paint ContoOff
Venice Serial
In Technical > Special Configuration:
- Set
RM / RCP Paint ContoOn
RCP Configuration
Venice IP
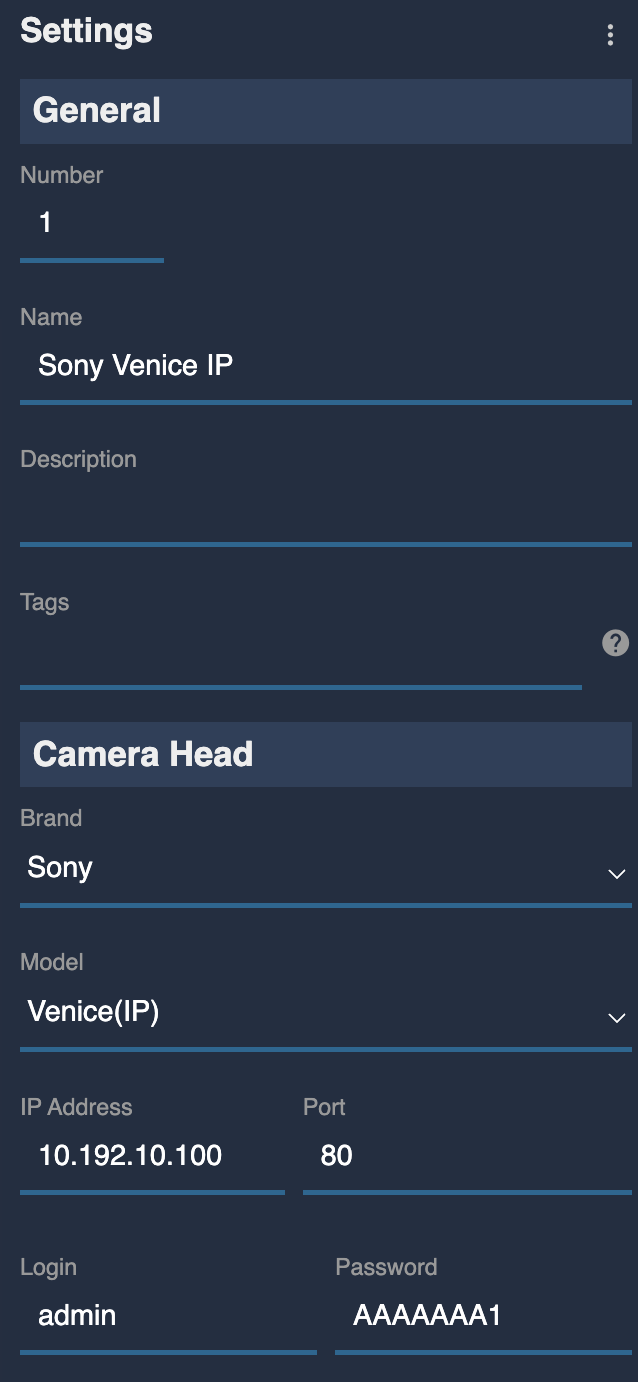
Add the camera as an IP camera.
Camera-specific settings:
- Select brand Sony and model Sony Venice(IP)
- Enter the camera IP address and the username/password set on the camera
Venice Serial
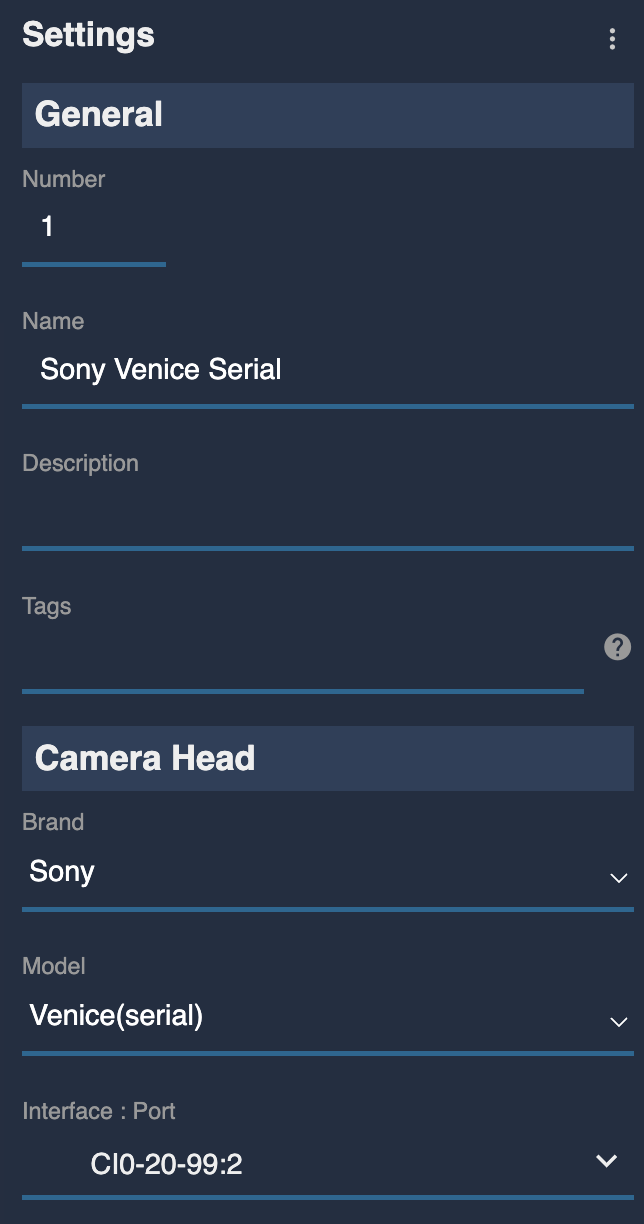
This is a serial camera — follow the Serial Camera Setup Guide to add it to the RCP.
Camera-specific settings:
- Select brand Sony and model Sony Venice(Serial)
- Select the CI0/RIO serial port the camera is connected to
Operations
Overview
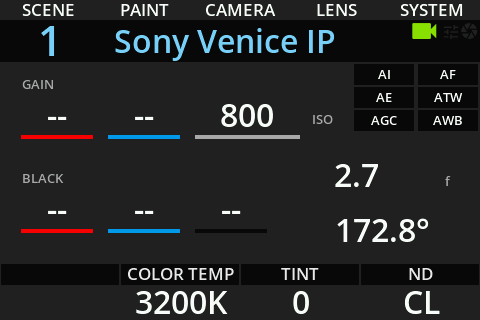
This video shows the RCP controlling the Sony Venice in IP mode:
On the exposure and joystick controls, you have access to iris, ISO, and shutter.
Assignable Keys
You can customise the 10 buttons on top of the RCP main screen via MENU > SYSTEM > ASSIGN. > Set Buttons. By default, keys 1–5 are not assigned (NA).
Example assignment:
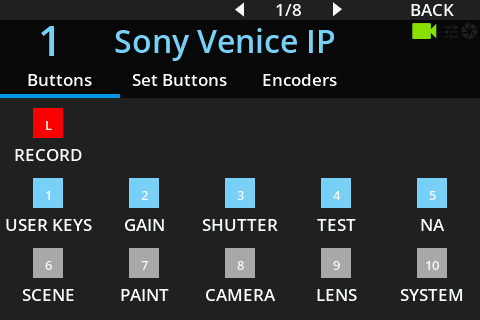
This gives quick access to:
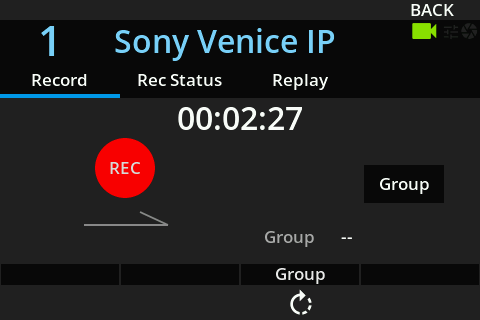
- Lock button — shortcut to REC menus (replay, etc.); LED reflects REC status
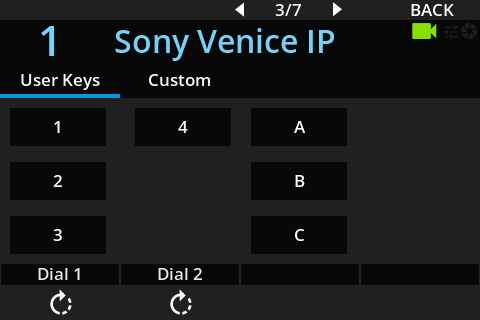
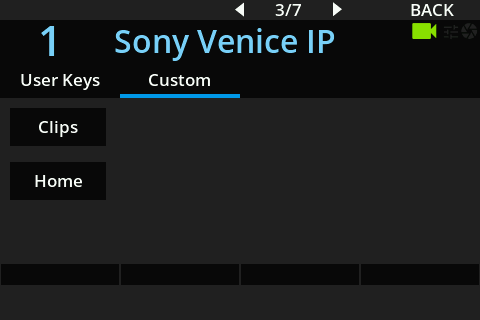
- Camera assignable buttons — 1–4, A–C, Home, and Clips
Base ISO from the gain view:
Shutter angle/speed from the shutter view:
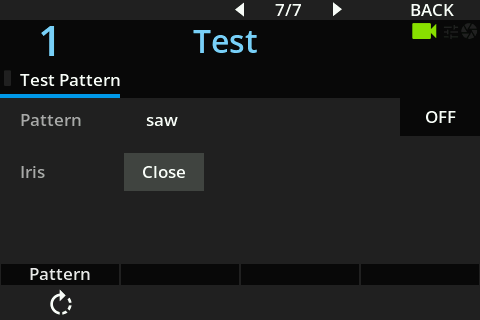
Test patterns from the test view:
Assignable Encoders
You can customise the 4 encoders below the RCP main screen via MENU > SYSTEM > ASSIGN. > Encoders. By default the encoders are assigned to gamma, saturation, detail, and ND.
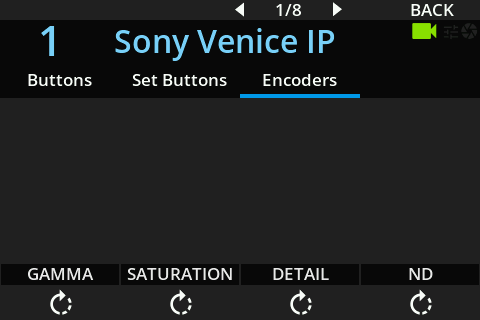
Default encoder view on the main screen:
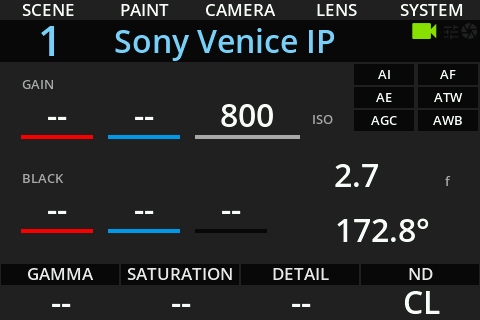
For Venice-style cinema workflows, reassigning encoders to colour temp, tint, and ND is recommended:
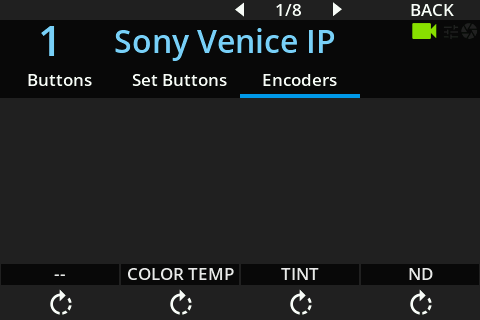
Result on the main screen:
Replay
To replay a clip: in Camera > User Keys > Custom, switch to Clips. Then in Record > Replay, select your last clip.
User Keys
User keys are accessible from the RCP at Camera > User Keys (in User Keys and Custom). You can only trigger them from the RCP — assignments must be configured on the camera body in Project > Assignable Button.
Troubleshooting
Camera icon stays RED / camera not detected
Check in this order:
- Verify camera settings — confirm
RM / RCP Paint Conis set correctly for the mode you are using (Off for IP, On for Serial), and that the IP address and authentication credentials are correctly set (see Camera Configuration above). A firmware update often resets these settings. - Ping the camera from a computer — set the computer to the same IP range and ping the camera IP to confirm basic network connectivity (IP mode only).
- Ping the RCP from the same computer — confirms the RCP and camera are on the same subnet (IP mode only).
- Check the RCP IP — the RCP must have an IP address in the same subnet as the camera. See Configure IP Addresses.
- Check the cable — for serial mode, ensure a CY-CBL-SONY-8P-03 is used and is securely connected.
- Power cycle — restart the camera (remove battery/PSU if needed) and retry.
- Verify model selection — confirm Sony Venice(IP) or Sony Venice(Serial) is selected in the RCP camera configuration to match the mode set on the camera.
A specific parameter is not controllable
- Verify the
RM / RCP Paint Consetting matches the protocol you are using (see Protocol Selection). - Advanced shading controls (Black balance, Detail, Matrix) are only available in Serial mode.
- Tally is only available in Serial mode and only when not recording.
- Some controls are disabled by the camera in specific OETF or colour space modes.
Tally not working
- Tally is only available in Venice Serial mode.
- Tally (RED only) is suppressed when the camera is recording — the record status uses the same indicator.
- Confirm
RM / RCP Paint Conis set toOnon the camera.