Dreamchip Atom

The Dreamchip AtomOne is a mini-camera controlled over a serial RS-485 link. It connects to the Cyanview CI0 or RIO using a dedicated adapter cable. Typical use cases include PoV, broadcast studio, pylons, goals, drone, onboard cameras.
Supported Models
All AtomOne cameras share the same RS-485 protocol and expose essentially the same controls. The AtomTwo (released in 2025) uses the same protocol with a few extended capabilities.
- AtomOne
- AtomOne Mini
- AtomOne Mini Zoom — includes built-in zoom control
- AtomOne 4K
- AtomTwo — released 2025; requires latest firmware on both camera and RCP
Compatibility Requirements
- Camera firmware: always update to the latest available release before use.
- RCP / RIO firmware: release 25.9.3 or above recommended.
Significant protocol changes were introduced on both the Dreamchip and Cyanview sides in 2023, 2024, and again in 2025 (release 25.9.3). Known incompatibility issues have been reported when cameras and RCP units run mismatched firmware versions. Always update both before troubleshooting.
Supported Controls
All paint controls available in Dreamchip cameras are accessible from the RCP. Controls that depend on specific hardware or configuration are noted in the table.
| Control | Notes |
|---|---|
| Gain | |
| Shutter | Including CLS (Clearscan) |
| Iris | Available on the AtomOne Mini Zoom or when using Dreamchip lens motors |
| White Balance | R/G/B Gain, AWB (single-shot auto), ATW (continuous) |
| Color Temperature | Sets R/G/B gains, similarly to a Sony system camera |
| Black Level | R/G/B/Master |
| Gamma | R/G/B/Master (BT.709 only) |
| Black Gamma | R/B + Master |
| Saturation | |
| Detail | |
| Denoise | |
| Flare | R/G/B/Master |
| Knee | Slope and point |
| User Matrix | |
| Multi-Matrix | 12, 16, 24 or 32 vectors |
| Color Space | BT.709 or BT.2020 |
| OETF | BT.709, HLG, PQ, Slog3 |
| Lens — Iris, Focus, Zoom | C-mount motors connected via camera AUX port, auto-detected by RCP; Zoom available on AtomOne Mini Zoom only |
| Video Format / Genlock | Requires saving as power-up default after any change; camera reboots internally |
| Flip | Upside-down or mirror |
Selecting an HDR OETF (HLG, PQ, Slog3) disables parts of the Dreamchip video pipeline. The camera will not prevent gamma adjustments in the RCP, but those changes will have no effect on the picture.
Known Limitations
- Settings are not automatically persisted at power-off. The camera boots with the settings last saved as power-up defaults, not its last live state. In normal (bidirectional) mode, the RCP detects the reconnection and immediately sends all stored values, fully restoring the camera state. In unidirectional mode, the camera runs on its saved defaults until the RCP resumes sending — see Unidirectional Mode.
Connection
The Dreamchip AtomOne connects to a Cyanview CI0 or RIO over a serial RS-485 link.
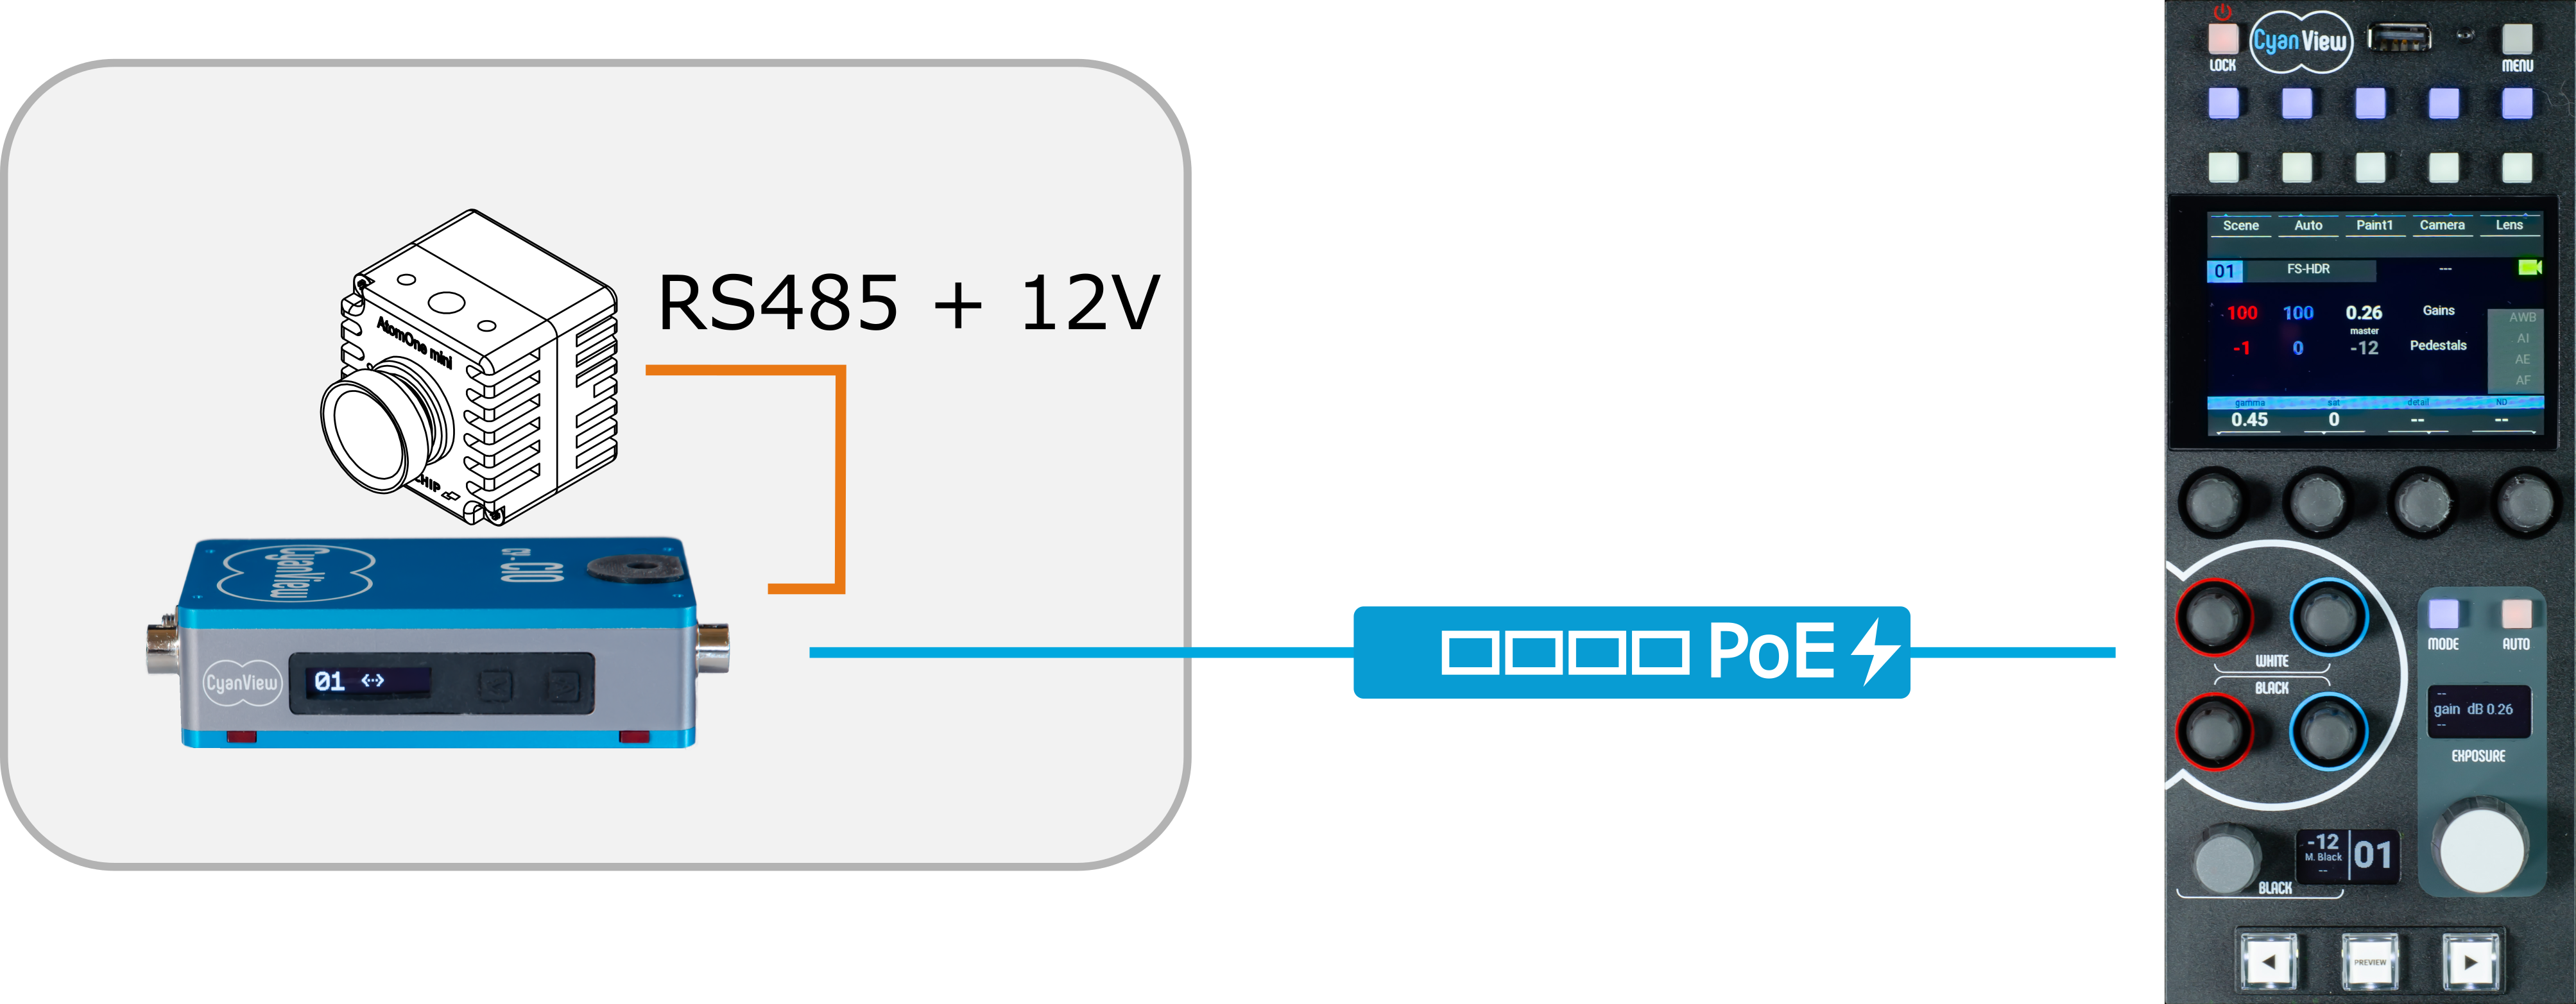
Required Accessories
Required:
- CY-CBL-DREAMCHIP-03 — CI0 / RIO to Dreamchip camera adapter cable
Optional:
- CY-CBL-6P-EXT-* — CI0 / RIO extension cable (available in multiple lengths)
Configuration
Camera Configuration
The camera ships with RS-485 enabled at a default baud rate of 115200. Most setups require no camera-side configuration beyond ensuring the firmware is up to date.
Baudrate
The AtomOne can be set to a non-default baud rate. Always verify which baud rate the camera is configured to before troubleshooting a connection issue.
Lens Calibration
If the camera is fitted with a motorized C-mount lens connected via the camera AUX port, or uses the built-in zoom on an AtomOne Mini Zoom, the lens is detected automatically by the RCP. Lens motors must be calibrated using the Dreamchip ProVideoGUI software before use — calibration sets the correct travel boundaries and movement direction for each axis.
The RCP controls the iris in f-stops and cannot invert motor direction. If the iris moves backwards or reports incorrect f-stop values, recalibrate the motor in ProVideoGUI.
Bus Camera ID
If the camera will share an RS-485 link with other cameras, assign it a unique bus ID using the Dreamchip ProVideoGUI software. Each camera on the bus must have a distinct ID.
Without a bus-specific ID, Cyanview uses camera ID 100 by default — the broadcast address that all Dreamchip cameras respond to. This works for single-camera setups but will cause all cameras on a bus to respond simultaneously.
RCP Configuration
Follow the Serial Camera Setup Guide to add the camera in the RCP web interface.
If the camera is not running at the default baud rate (115200), the CI0 / RIO must be updated to match:
- Open the camera configuration in the RCP web interface.
- Click the three dots in the top-right corner to activate Advanced Mode.

- Scroll down to the Speed menu (just below Interface: Port) and enter the camera's baud rate.

Operations
All parameters that the RCP controls are restored from its stored values each time it connects to the camera. Parameters outside the RCP's control — such as video format, genlock, lens calibration, and picture profiles not exposed by the RCP — must be configured in the Dreamchip ProVideoGUI software and saved as power-up defaults on the camera. Once saved, they remain unaffected when the RCP connects.
Auto-Save
The Dreamchip auto-save feature should not be used when the camera is under RCP control. With auto-save enabled, the camera writes every incoming parameter change to internal storage, which significantly reduces responsiveness and can cause the camera to fall behind on rapid RCP commands.
Gamma Controls in HDR Mode
Gamma controls (R/G/B/Master) have no effect when the camera is in an HDR OETF mode (HLG, PQ, Slog3). The camera disables the gamma processing pipeline in these modes — the RCP will not prevent adjustments, but they will have no effect on the picture.
Unidirectional Mode
The RCP operates in bidirectional mode by default — it sends commands and waits for the camera to respond within a timeout. This requires a working return path on the RS-485 link.
For setups where data return from the camera is unavailable (RF modems, fiber converters, or other unidirectional links), unidirectional mode can be enabled in the Advanced Mode of the camera configuration in the RCP web interface. The Dreamchip AtomOne and AtomTwo support unidirectional mode.
In unidirectional mode, the camera icon on the RCP will remain red even when the camera is correctly receiving and applying commands. Use the video output to confirm the camera is responding. See Unidirectional Mode for full details.
External Lens Configuration
Only configure the Lens menu when using an external lens controller that is not connected through the camera. Configuring external lens control while the lens is routed through the camera will cause compatibility issues.
To configure external lens control, open the camera configuration menu, scroll down to Lens, enter the model number and the RIO interface port.

Power-Up Defaults
The Dreamchip camera does not persist paint settings across power cycles automatically. When the RCP connects, it restores all paint settings from its stored values — so power cycling the camera does not lose the last RCP state.
Video format, frame rate, and genlock settings are not restored by the RCP and must be saved as power-up defaults on the camera itself.
Two special RCP commands manage this:
-
SAVE— Saves all current camera settings as power-up defaults. Use this after:- Changing video format or genlock (not restored by the RCP on reconnect).
- Operating over a weak or wireless link where the camera may restart before the RCP reconnects.
- Preparing a camera for use as a PoV without a live control link.
-
FACT-D(Factory Default) — Resets the camera to factory settings. Useful when unexpected behavior is suspected to be caused by settings changed outside the RCP. Also accessible fromSCENE > S FILES > Reference > Load Factory.
If the Dreamchip ProVideoGUI is used to save settings as power-up defaults, the RCP will overwrite most of them on next connection. Only video format, genlock, and settings inaccessible from the RCP (such as lens calibration) are preserved.
Multi-Camera / Bus Setup
Dreamchip cameras support an RS-485 bus topology where multiple cameras share a single serial link from the CI0 or RIO. This reduces cable runs when budget or physical access makes individual per-camera CI0 ports impractical, though the simpler 1 camera per CI0 port approach is generally preferred as it gives more redundancy and easier troubleshooting.
Camera ID Assignment
Before connecting cameras to a bus, assign each camera a unique bus ID using the Dreamchip ProVideoGUI software. The default broadcast ID (100) makes all cameras on a shared link respond simultaneously — this is fine for single-camera setups but will break bus operation.
Dreamchip firmware updates can reset bus ID, baud rate, and group settings back to factory defaults. Re-verify and re-apply all of these in ProVideoGUI after any camera firmware update.
RCP Bus Configuration
A Dreamchip bus is added in the Feature block of the RCP Configuration:
- Click
+in the Feature section and select the bus type. - Set the camera ID range and select the CI0 / RIO serial port the bus is connected to.
- Cameras configured on the bus will appear as separate camera entries on the RCP.
The RS-485 bus selector in the RCP configuration UI does not persist — this is expected behavior, not a bug.
Physical Wiring
The RS-485 bus uses a daisy-chain topology. Wire and terminate the bus according to the Dreamchip RS-485 specification. The CY-CBL-DREAMCHIP-03 cable connects one end of the bus (or a single camera) to the CI0 / RIO port; bus extension cabling between cameras must be made to Dreamchip's RS-485 pinout.
Dreamchip cameras have also been used successfully on wireless RS-485 links using RF modems (e.g. rfdesign.com.au modules) — enable Unidirectional Mode if the RF link does not carry return data.
Troubleshooting
Before You Start
Update both the camera firmware and the RCP / RIO to the latest available release before troubleshooting:
- Camera firmware: Dreamchip wiki
- RCP firmware: see the release notes
Then verify the camera responds to the Dreamchip ProVideoGUI software. This isolates whether the issue is camera-side or Cyanview-side, and makes it easier to reproduce and report.
Camera Icon Stays RED / Camera Not Detected
Even when the icon is red, the RCP continues sending commands. Use the video output to distinguish two failure modes:
Video output changes when you adjust controls (commands are reaching the camera):
- The camera is receiving commands but not sending data back to the CI0 / RIO.
- If any equipment sits between the CI0 / RIO and the camera (RF modem, fiber converter), return data may not be relayed correctly. This can happen with unidirectional links or devices that do not switch RS-485 direction fast enough.
- The Dreamchip group feature can silence a camera's responses — check in ProVideoGUI that groups are not enabled unexpectedly.
Video output does not change (commands are not reaching the camera):
- Use ProVideoGUI to test the camera directly, and perform a full reset in case baud rate, camera ID, or group settings have been changed.
- Bypass any custom equipment (fiber, wireless) and test with a direct cable connection.
- Try a different cable and a different port on the CI0 / RIO.
- Connect a USB-serial dongle to the RCP USB ports using the same cable and camera as with ProVideoGUI — this isolates whether the issue is software or hardware.
A Specific Control Is Not Working
- Confirm both the camera and RCP are on the latest firmware (see Before You Start).
- Some controls are disabled by the camera when a specific OETF is active — for example, log, HLG, and PQ modes disable gamma controls.
- Reset the camera to factory defaults:
- Via ProVideoGUI, or
- From the RCP:
SCENE > S FILES > Reference > Load Factory.
Lens Control Not Working
- Dreamchip motors are connected directly to the camera and must be calibrated using ProVideoGUI. Calibrate and verify lens motors there before troubleshooting the RCP.
- If the iris moves in the wrong direction, or f-stop values are inverted (f2 when closed, f32 when open), the motor direction and calibration must be corrected in ProVideoGUI. The RCP cannot invert motor direction.
- Ensure nothing is selected under Lens — External control override in the camera configuration. An accidentally selected entry routes lens commands away from the camera. Select the empty line to remove any selection.
- For power-hungry configurations (e.g. AtomOne 4K Mini with external motors), PoE from the CI0 alone may be insufficient. Connect a 12–24 V DC supply to the CI0.
Camera Firmware Update Broke Control
- Firmware updates can reset baud rate, camera ID, and group settings. Re-verify these using ProVideoGUI and re-apply them after any firmware update.
- Do not update camera firmware during a live production. Test in a controlled environment first.