Blackmagic Cameras
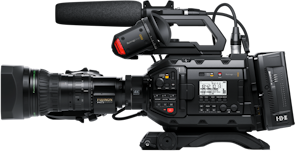
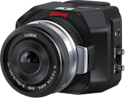
Blackmagic cameras are controlled through three methods: IP via the REST API, SDI metadata injection via an RSBM or CI0BM, or IP to an ATEM switcher which then relays control over SDI. They connect to the Cyanview RCP on a standard Ethernet network or through a serial port on a CI0 or RIO. Typical use cases include studio multi-camera productions, broadcast, and live events requiring shading and recording control.
Supported Models
IP only
- Blackmagic PYXIS 6K
IP & SDI Camera Control
- Blackmagic URSA Cine 17K 65
- URSA Cine 12K LF
- Blackmagic URSA Cine Immersive
- Cinema Camera 6K
- URSA G2 Broadcast
- Micro Studio Camera 4K G2
- Studio Camera 4K Plus
- Studio Camera 4K Pro
- Studio Camera 6K Pro
- Studio Camera 4K Plus G2
- Studio Camera 4K Pro G2
SDI Only
- Micro Studio 4K
- Ursa Mini 12K
- Ursa Mini Pro 12K
HDMI from SDI through Microconverter
Pocket Cinema cameras can be controlled via the SDI protocol, but require the Blackmagic Microconverter to convert the camera's HDMI output to SDI. This converter also takes the return SDI signal, enabling camera control commands to be sent back to the camera over the HDMI return data link.
Please be aware it is highly recommended that the camera and Cyanview equipment is updated to the latest software version.
In 2024, Blackmagic introduced IP control via the REST API. Older firmware versions will not support this feature. While the SDI return video control remains unchanged, new gain commands were added to the Ursa cameras in 2024. We have adjusted our system to ensure compatibility with both newer and older cameras. If gain control does not function correctly, it is likely an indication that an update is required.
Compatibility Requirements
- Camera firmware: latest version strongly recommended. In 2024, Blackmagic introduced IP control via the REST API — older firmware will not support IP control.
- RCP / RIO firmware: release 25.12.1-rc2 or above required for tally over IP on Ursa G2 Broadcast and Pyxis.
Protocol Selection
This camera can be configured in three modes in the RCP:
- IP — Uses the Blackmagic REST API over Ethernet. Provides full bidirectional control. Best for cameras with a network port (built-in or via USB-C adapter). Requires camera firmware from 2024 or later.
- SDI — Uses SDI metadata injection via an RSBM or CI0BM. Provides unidirectional control (no camera feedback). Best for cameras without an Ethernet port or in SDI-only infrastructure.
- ATEM — Uses IP to an ATEM switcher, which relays control over SDI to the cameras. Bidirectional between RCP and ATEM, but unidirectional from ATEM to cameras.
SDI control (direct or via ATEM) is unidirectional: the camera does not send any feedback to the RCP. Values displayed on the RCP may differ from the camera's actual state, which can cause jumps when adjustments are made.
Supported Controls
| Control | Notes | Support |
|---|---|---|
| Iris | Manual and Auto | ✔ |
| Gain | Gain in dB or ISO | ✔ |
| Shutter | Manual, Auto, ECS | ✔ |
| White Balance | R/G/B gains, Color Temperature and Tint | ✔ |
| Black Balance | R/G/B/Master black level | ✔ |
| Gamma | R/G/B and Master Gamma | ✔ |
| Saturation / Hue | ✔ | |
| Record | ON/OFF, status and TC | ✔ |
| Tally | Available over SDI or ATEM on all models except Ursa Cine. Available over IP only on Ursa G2 Broadcast and Pyxis. | ✔ |
| Lens | Zoom and Focus | ✔ |
Control through SDI — whether sent directly from the RCP or through the ATEM and program video path — is unidirectional. The camera does not send feedback about its current state to the RCP, so values on camera may differ from those displayed by the RCP, leading to potential jumps when adjustments are made.
As of December 2025, tally functionality was not available in the REST API, but it has now been added for the Ursa G2 Broadcast and Pyxis cameras. This feature is available starting from release 25.12.1-rc2 of the RCP or RIO. We hope other camera models will receive tally support in future firmware updates.
Connection
Blackmagic cameras can be connected over:
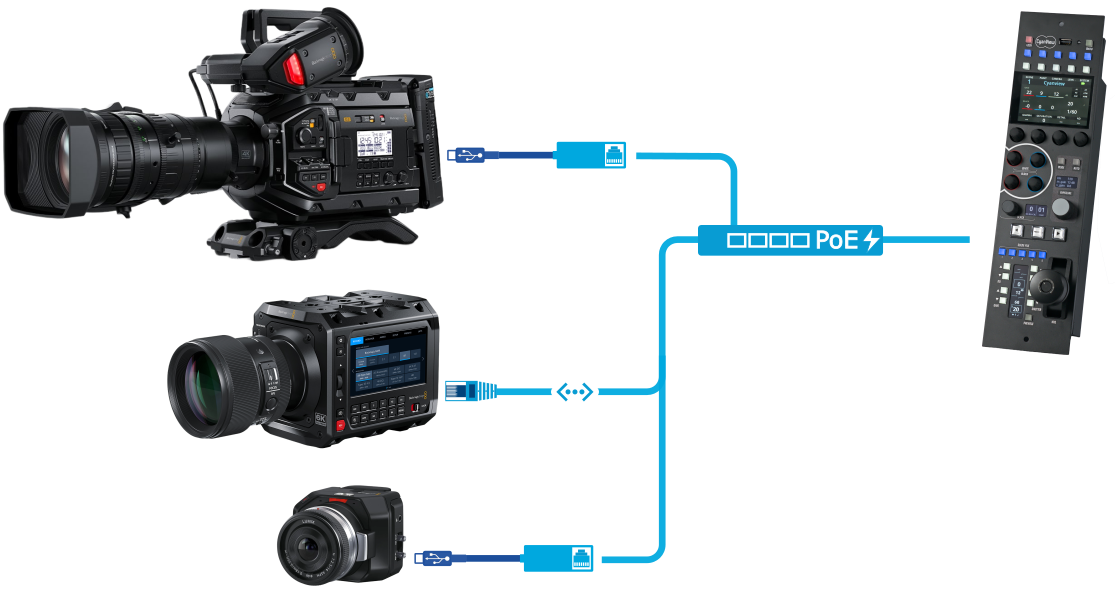
- IP / Ethernet: Connect the camera directly to the network using its RJ45 port or a USB-C to Ethernet adapter. The RCP must be on the same subnet as the camera.
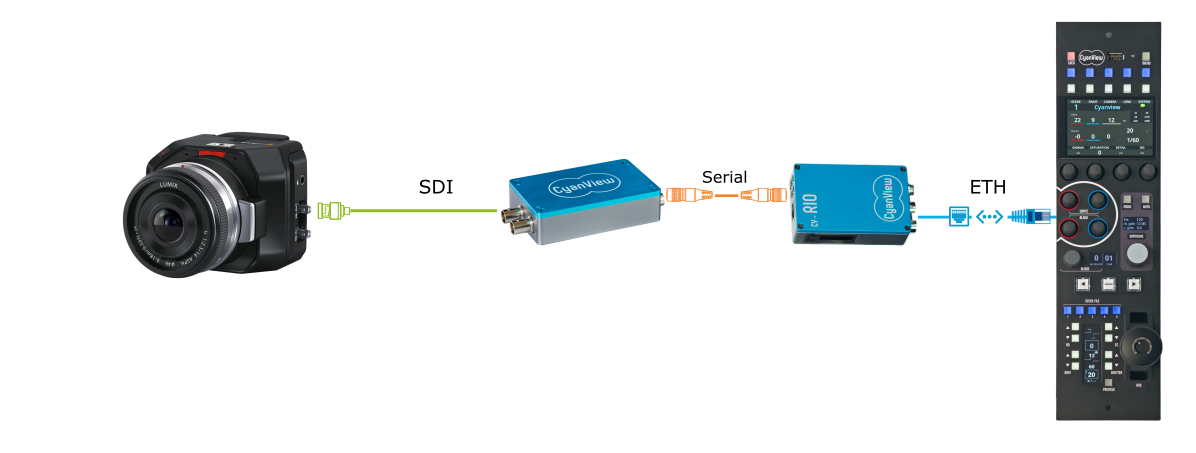
- SDI (via RSBM or CI0BM): Connect the RSBM or CI0BM SDI interface to a CI0 or RIO serial port. Run an SDI cable from the interface to the camera's SDI program input.
- ATEM (IP to SDI relay): The RCP connects to the ATEM over IP; the ATEM relays camera control to cameras via SDI program return.
IP Workflow
Some cameras do not have an RJ45 port and require a USB-C to Ethernet adapter. While most adapters work with the cameras, Blackmagic recommends the Belkin USB-C to Gigabit Ethernet Adapter in their manuals, noting that although other adapters may function, the Belkin's chipset has proven to be the most reliable for RTMP video streaming workflows.
SDI Workflow
Camera control via SDI is enabled by integrating a Blackmagic SDI control injection board with a standard CI0 or RIO unit.
There are two main approaches for SDI camera control: using a dedicated single-box solution, or adding a converter to existing CI0 or RIO equipment.
RSBM
The RSBM combines the SDI control board with power and signal conditioning converters, creating an interface that can be connected to any standard CI0 or RIO via one of its two serial ports.
CI0BM
For a streamlined setup, the SDI control board is also available as an integrated layer within the CI0, resulting in an all-in-one device. This configuration offers the same functionality as the RSBM, but routes SDI control through an internal port, leaving both serial ports on the CI0 free for other camera or lens control tasks.
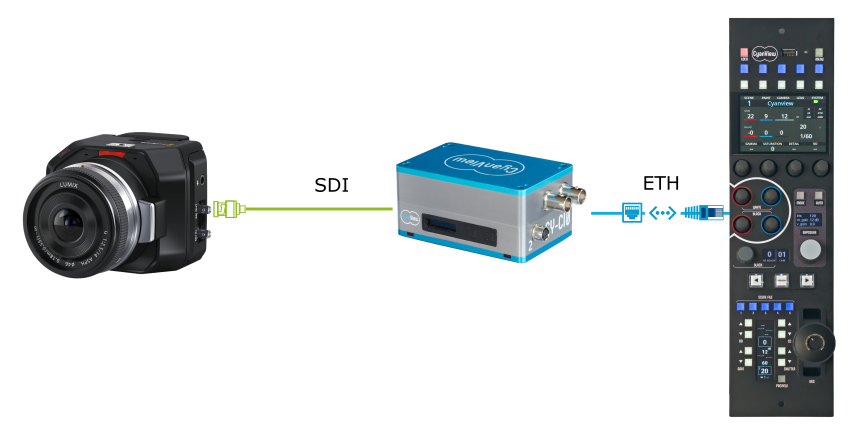
ATEM Workflow
We advise caution when using this integration in large-scale setups. Blackmagic ATEM switchers can be sensitive to both the number of connected devices and the volume of control commands sent. Managing multiple cameras, especially when issuing group commands, may result in a high command throughput that can overwhelm the ATEM and potentially cause instability.
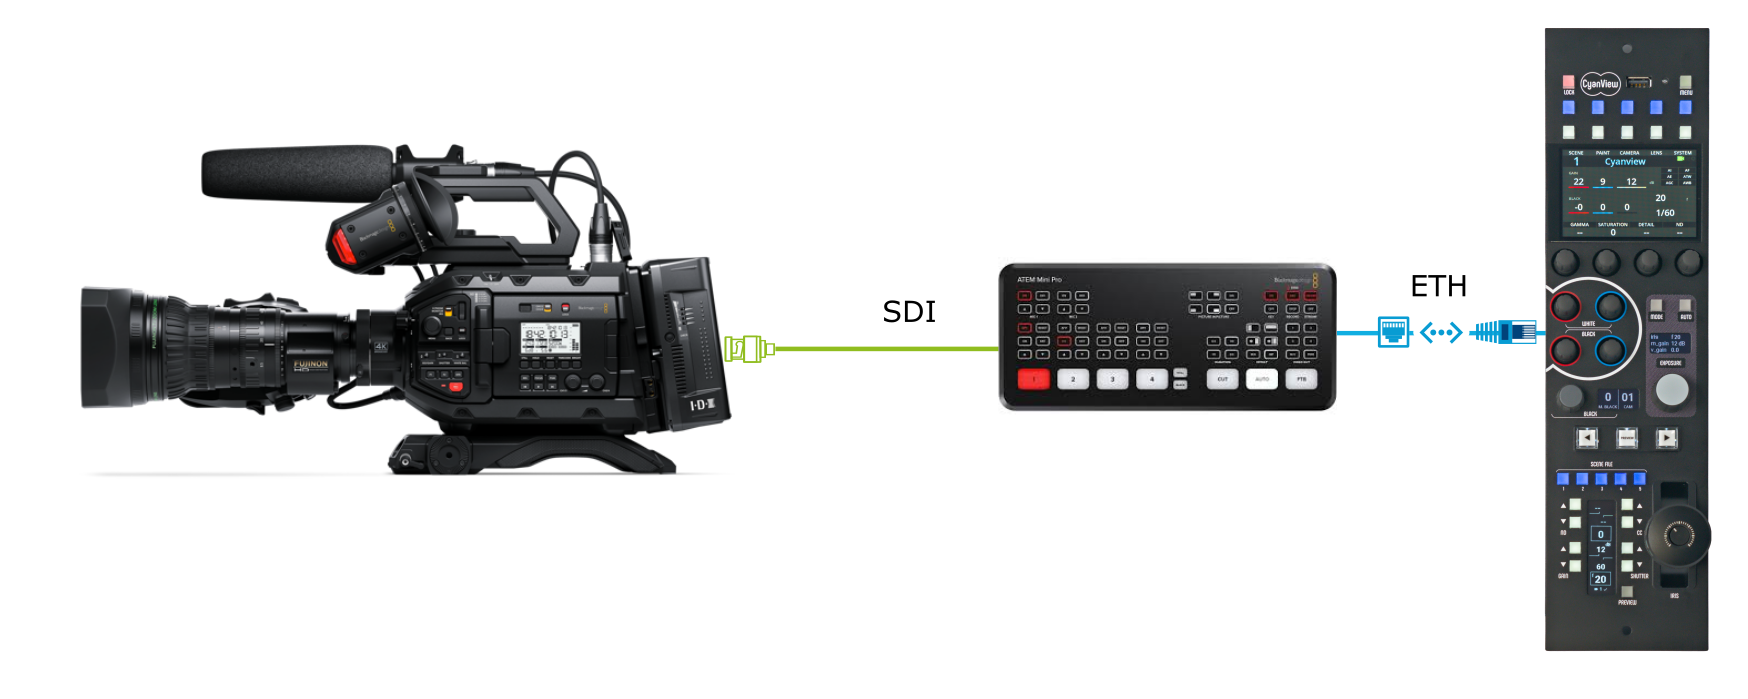
This workflow is most commonly used when you already have an ATEM switcher with SDI program output connected to your cameras' PGM inputs, and you want to use control panels other than Blackmagic's own. In this setup, communication between the RCP and the ATEM is bidirectional, so adjustments made on either the RCP or within the ATEM software's RCP tab will stay in sync and reflect each other in real time. However, control from the ATEM to the cameras remains unidirectional just as with a standard Blackmagic workflow.
Required Accessories
Required (IP control):
- USB-C to Ethernet adapter — Belkin USB-C to Gigabit Ethernet Adapter is recommended by Blackmagic, for cameras without a built-in RJ45 port.
Required (SDI control):
- RSBM — SDI control injection interface for use with a CI0 or RIO, or
- CI0BM — CI0 with integrated SDI control board (all-in-one solution).
Required (ATEM control):
- Blackmagic ATEM switcher with SDI program output connected to the cameras' PGM inputs.
Configuration
Camera Configuration
IP Control — Camera Setup
Launch Blackmagic Camera Setup and select your camera from the detected devices. For initial setup, connect the camera via a USB cable, unless control over Ethernet has already been enabled.
Within the software, configure the camera's IP address. Ensure it is a valid IP for your network, whether using DHCP or a static assignment.
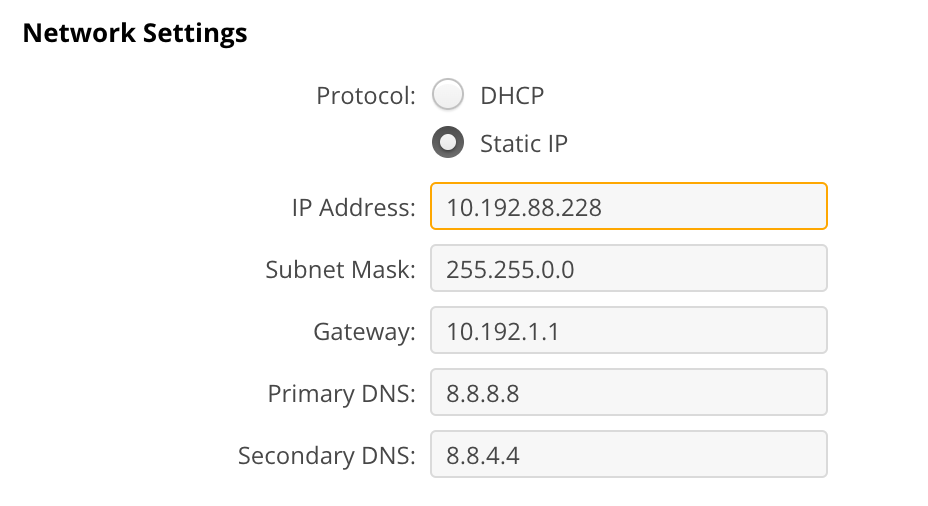
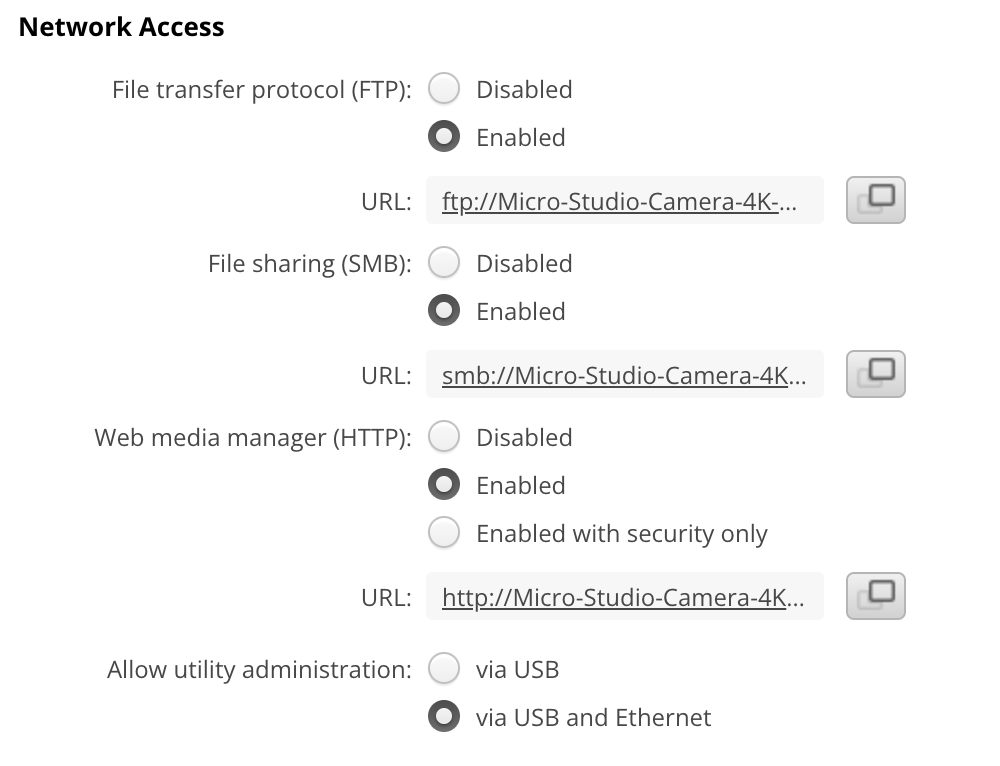
Enable Web media manager (HTTP) which provides the remote control REST protocol.
SDI Control — Camera Setup
Assign a unique Camera Number in the camera settings. This number corresponds to the camera ID used in the RCP (from 1 to 255). Cameras without a unique number assigned will default to ID 1.
ATEM Control — Camera Setup
No special on-camera settings are required beyond the standard ATEM SDI setup. Refer to Blackmagic's ATEM documentation for SDI return routing.
RCP Configuration
IP Control
Add the camera as an IP camera. Use brand Blackmagic and model IP, then enter the camera IP address.
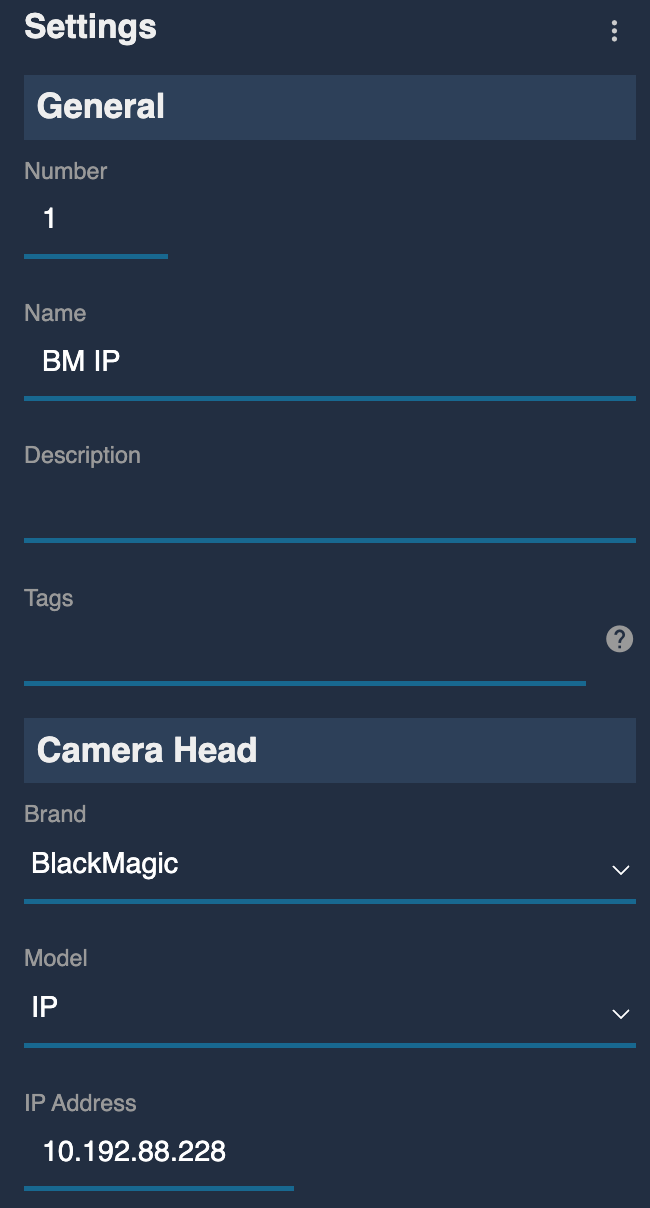
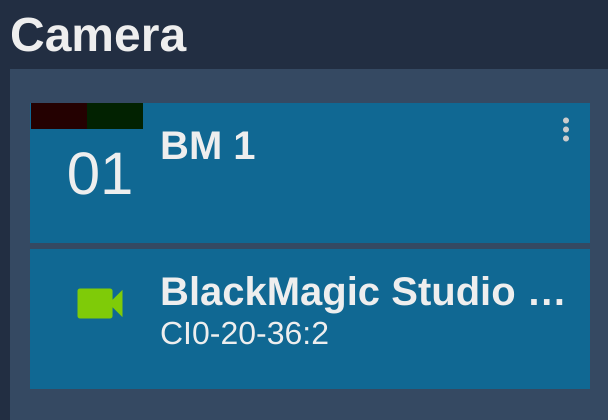
If configured correctly, the status will go green:
SDI Control
Add the camera via the RCP Configuration. Use brand Blackmagic and model SDI, then select the interface port:
- CI0BM: select
CI0 port 3 - RSBM on RIO: select the port where the RSBM is plugged
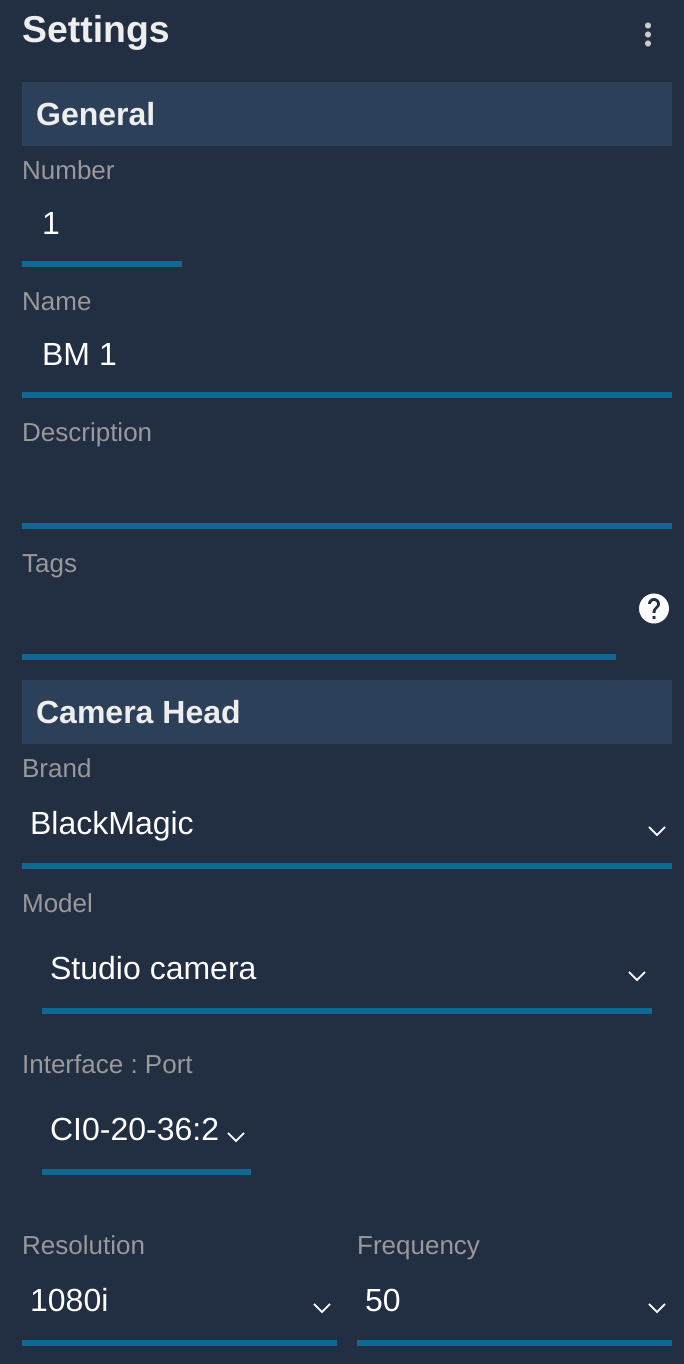
If configured correctly, the status will turn green. This indicates that the CI0 or RIO is communicating with the RSBM, but it does not confirm that the camera itself is connected. Because camera control is unidirectional, there is no way to verify the camera connection from this interface.
The RCP uses camera ID 1 for control. If you need to use a different ID, or control multiple cameras, refer to the Multi-Camera / Bus Setup section below. Otherwise, ensure all your cameras are configured with control ID 1 in their settings.
ATEM Control
First add your ATEM in the configuration — see the ATEM configuration guide. Confirm the ATEM block is green:
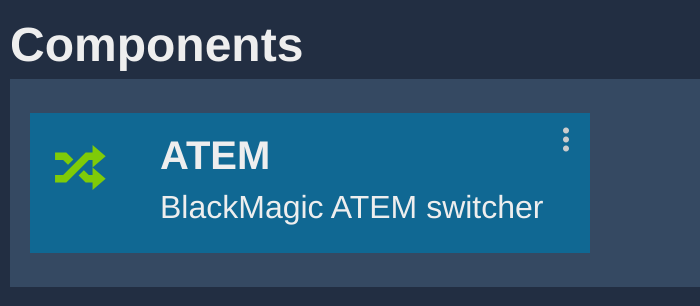
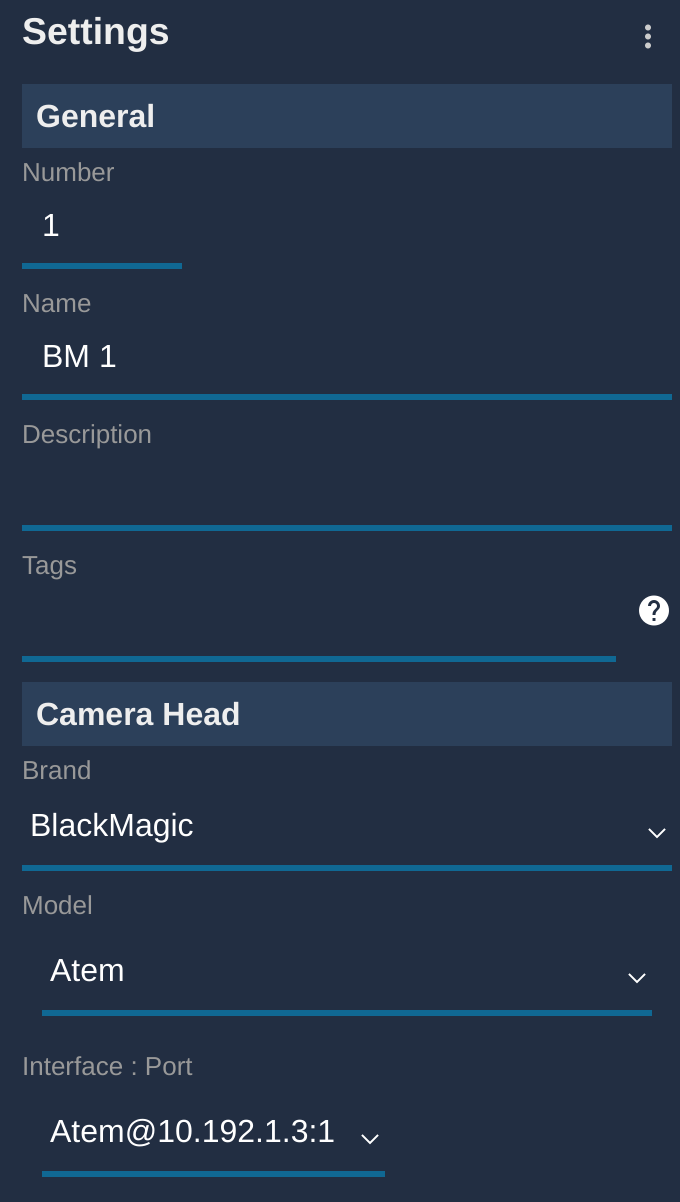
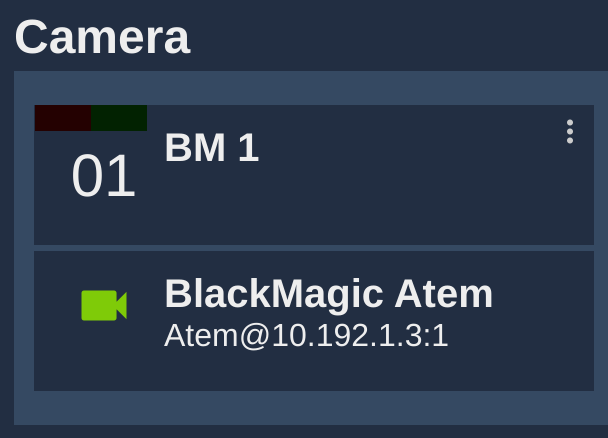
Then add the camera via the RCP Configuration. Use brand Blackmagic and model Atem, then select your ATEM and camera ID from the interface drop-down.
If your ATEM has the IP 10.192.1.3 and your camera the ID 1:
- The camera setup:
- The camera block:
Multi-Camera / Bus Setup
Controlling multiple cameras over a single SDI signal works similarly to using the ATEM program return to send control commands to all your cameras. With the RSBM or CI0BM interface, you can manage several cameras on what is referred to as a "bus."
Configure the cameras
To set this up, each camera must be assigned a unique Camera Number in its settings. This is the same approach used when controlling multiple cameras from an ATEM switcher, where each camera is given the number that matches its ATEM input. In this workflow, the camera number should correspond to the number assigned in the RCP (from 1 to 255).
Create a Blackmagic SDI control bus
Once the cameras are assigned a number, the rest of the configuration is done on the RCP (or RIO).
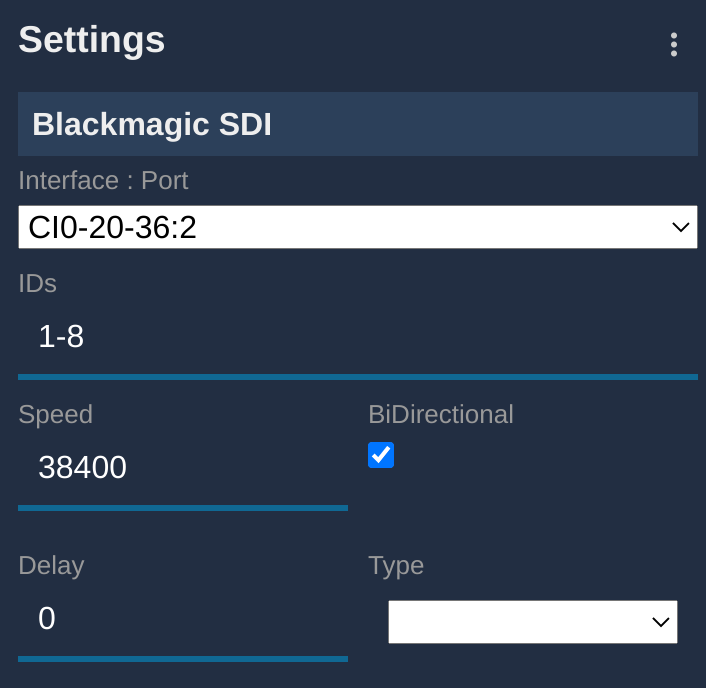
- In your RCP/RIO web UI, click on
+in the Features section. - Select
Blackmagic : SDI Bus. - On the new block that appears, select your CI0 (port 3 for a CI0BM, and 1 or 2 if you're using a CI0/RIO + RSBM).
- Adjust the IDs range based on the min and max numbers you have to control — for example, cameras from ID 1 to 8.
- Leave all other settings unchanged.
Assign a bus channel to cameras on the RCP
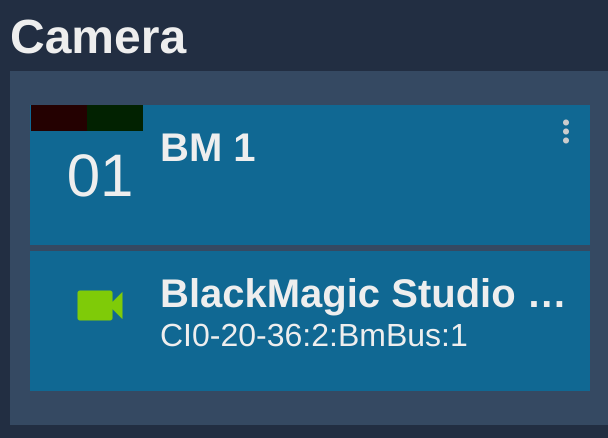
Add the camera via the RCP Configuration. Use brand Blackmagic and model Studio camera, then select your CI0 serial port and camera ID from the interface drop-down. For example, CI0 CI0-20-36 with RSBM on port 2 and camera ID 1:
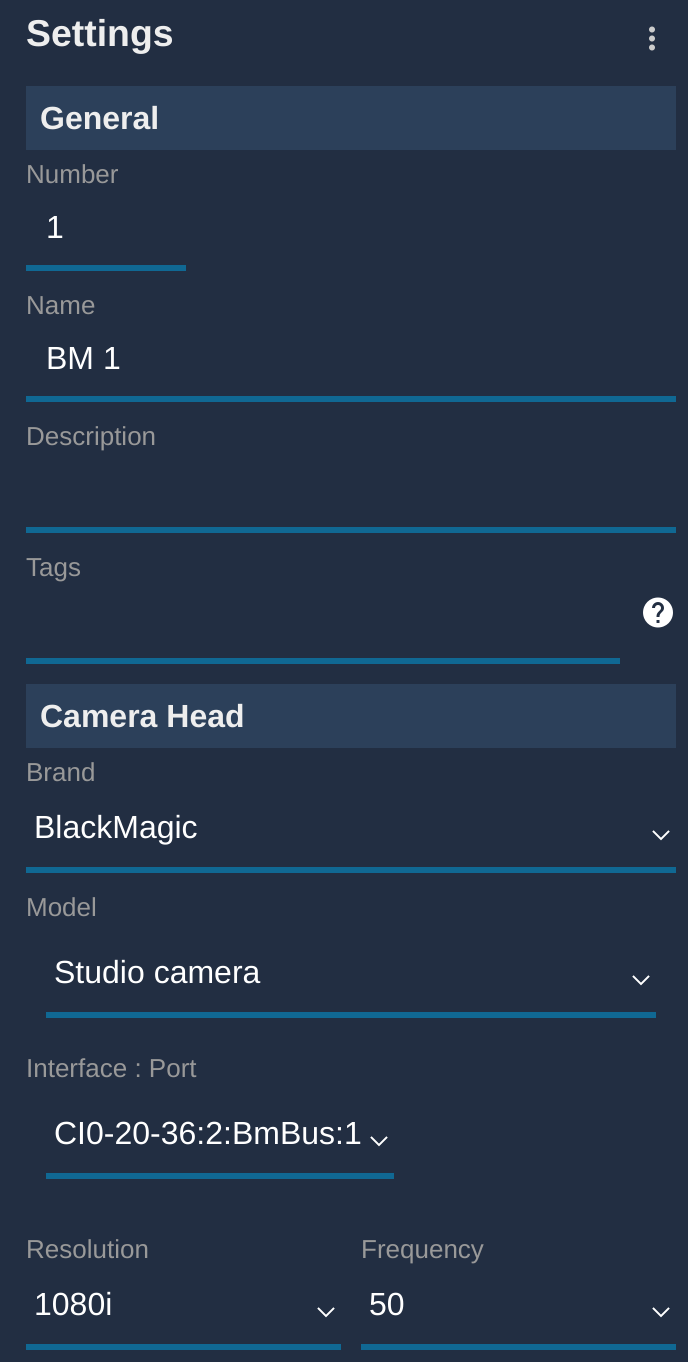
Your camera should be green and working:
Troubleshooting
Camera icon stays RED / camera not detected
Check in this order:
- Verify camera settings — confirm the IP address,
Web media manager (HTTP)is enabled, and the camera firmware is up to date (see Camera Configuration above). A camera firmware update often resets network settings. - Ping the camera from a computer — set the computer to the same IP range and ping the camera IP to confirm basic network connectivity.
- Ping the RCP from the same computer — confirms the RCP and camera are on the same subnet.
- Check the RCP IP — the RCP must have an IP address in the same range as the camera. Follow this guide.
- Power cycle — restart the camera and retry.
- Check the cable / adapter — try a different Ethernet cable or USB-C adapter. The Belkin USB-C to Gigabit Ethernet Adapter is Blackmagic's recommended adapter.
- Re-enable Web media manager on the camera — this often clears a stuck state.
A specific parameter is not controllable
- Confirm the correct protocol mode is selected in the RCP (IP, SDI, or Atem) — see Protocol Selection.
- Confirm camera and RCP/RIO firmware are both up to date.
- For SDI control: gain commands changed in 2024. If gain control does not function correctly, a firmware update on both camera and RCP is likely required.
- Some controls are not available on all models — see Supported Models.
Tally not working
- Tally over IP is only available on Ursa G2 Broadcast and Pyxis cameras, starting from RCP/RIO firmware release 25.12.1-rc2.
- Tally over SDI or ATEM is available on all other supported models except the Ursa Cine.
- Confirm the correct connection method is in use for your camera model.
Unstable connection / camera drops in and out
- Confirm the USB-C to Ethernet adapter is compatible (Belkin recommended by Blackmagic).
- Use a static IP address for the camera rather than DHCP.
- Avoid high command throughput on ATEM-based setups — see the warning in ATEM Workflow.
Camera firmware update broke control
- Firmware updates often reset network and remote control settings — re-apply the settings from Camera Configuration.
- IP control requires Blackmagic firmware from 2024 or later. Older firmware does not support the REST API.
- As a general rule: do not update camera firmware during a live production. Test first in a controlled environment.