Add a Serial Camera
Overview
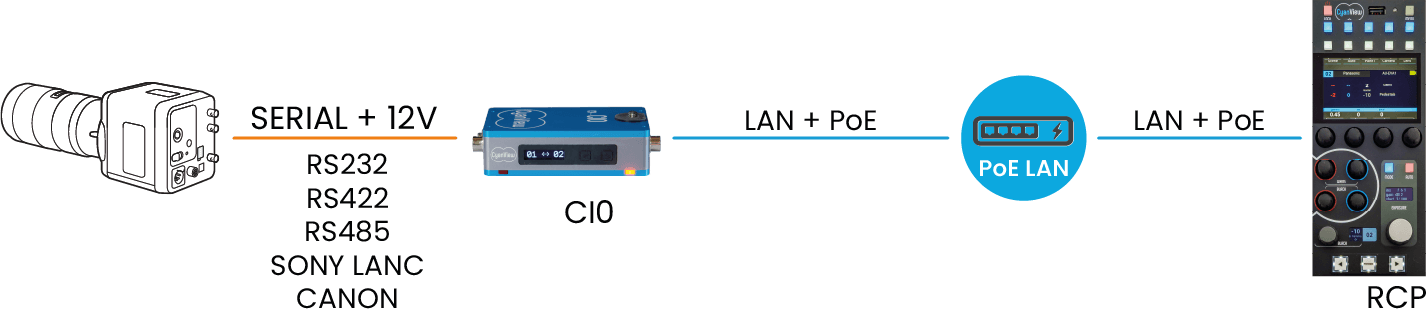
The CI0 interface is used to control serial cameras over IP networks from your RCP.
Prerequisites
-
PoE Network Switch: both CI0 and RCP are PoE compatible and the easiest way to get started is to use a PoE switch. Inexpensive models from Netgear, Ubiquity, TPC Link, etc. are perfectly fine. Without a PoE switch, 12V power supplies with locking plugs can be ordered separately (they are not included in the default package). Regular DC 12V power adapters can also be used.
-
Camera Cable: we provide various cables to connect any of the supported cameras to your CI0. All pinouts are published if you prefer to make your own cables: CI0 cable pinouts
-
Computer: required to access the web configuration of the RCP.
Connection Setup
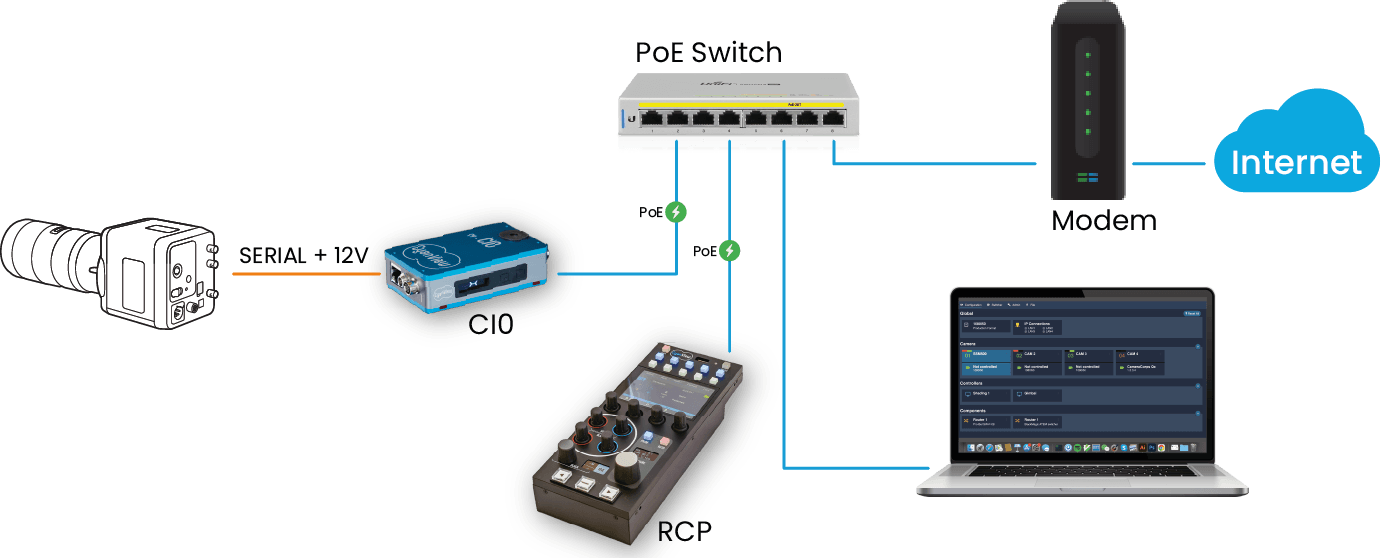
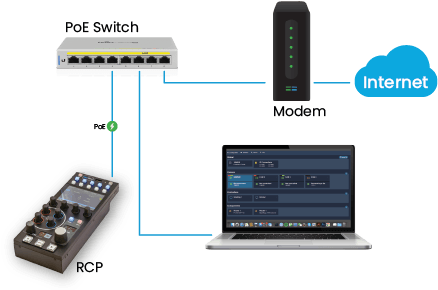
[ 1] Connect the RCP, the CI0 and your computer to the PoE switch. For software update, connect the switch to your internet access.
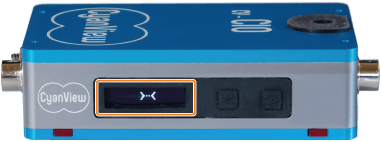
[ 2] Check the CI0 network status on the LCD. Once the CI0 discovers the RCP, it should indicate this sign: >-<. This means that the RCP is reachable but the CI0 isn't part of the configuration yet.
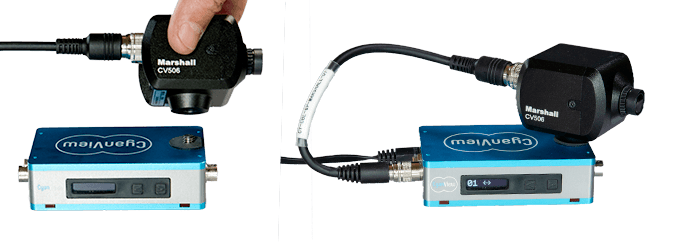
[ 3] Connect the camera to the right CI0 port. Follow the Integrations section for details about your camera setup and cable. A mini-camera can also be directly mounted using the top 1/4" screw using a small flat screwdriver from the bottom of the CI0.
RCP configuration
[ 1] Access the RCP RCP Configuration.
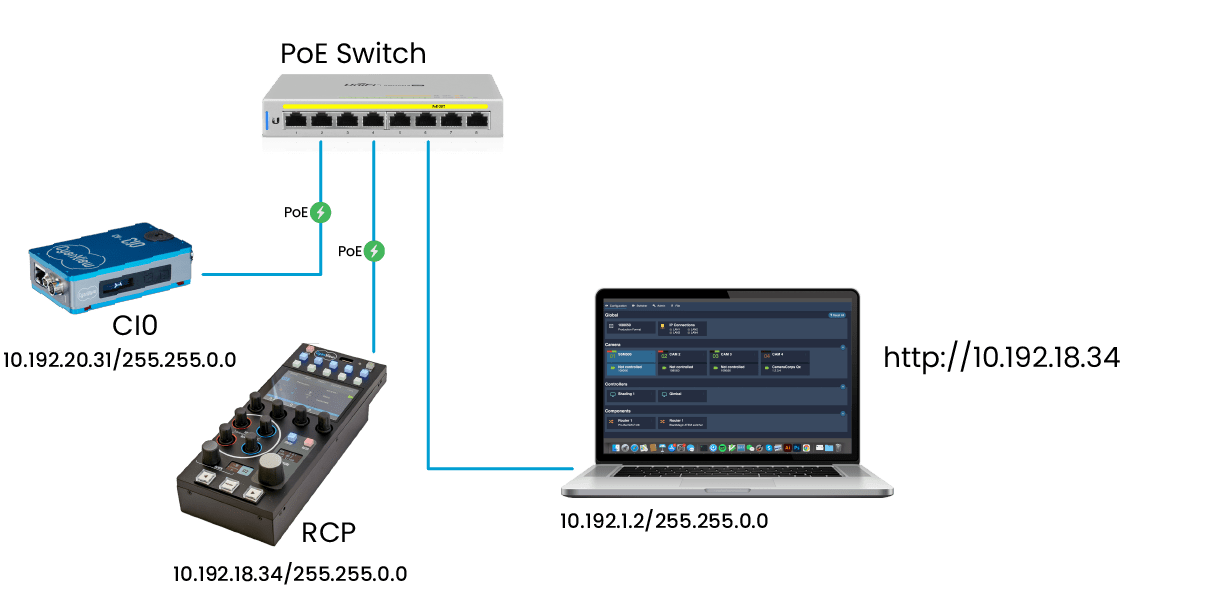
The following diagram shows a static configuration for an RCP with serial CY-RCP-18-34.
You should get access to the following page.
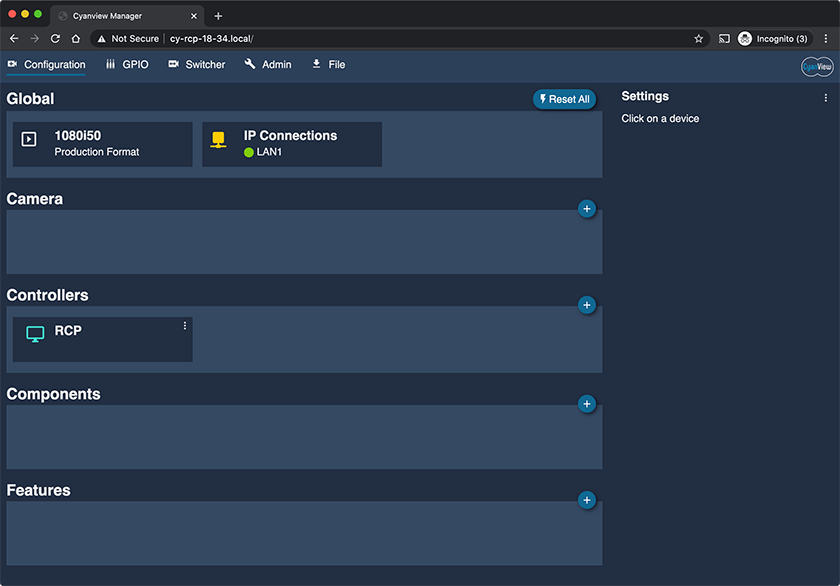
[ 2] Add a camera: click the + button on the top right of the camera section. New camera properties appear in the right sidebar. Fill-in these fields:
- Number: camera number displayed on the RCP
- Name: camera name displayed on the RCP
- Camera Head Model: Select your camera make and model from the list. An interface section will appear.
- Interface Port: Select your CI0 in the list, the last digit indicates which CI0 connector (1 or 2) the camera is connected to.
[ 3] Checking if the camera is properly connected.
-
The camera icon in the web inteface will turn green when the camera has been detected and configured.
-
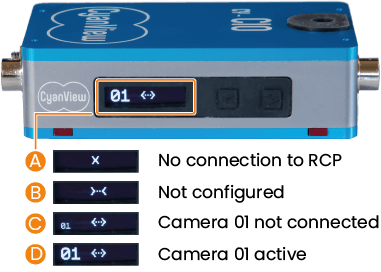
The CI0 will also display the camera number in bold [D], which indicates that the camera is communicating. If the number is small [C], the CI0 has been configured by the RCP but no communication can be established with the camera. Check the cable, connection and the troubleshooting section of your camera in the Integrations section.
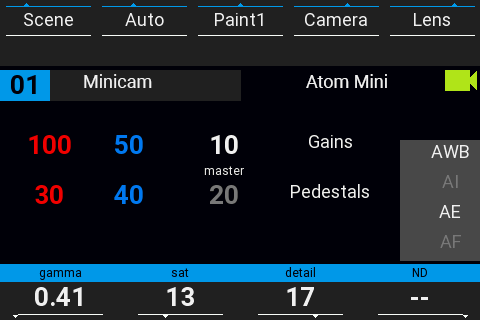
- The camera icon on the RCP turns green, indicating that the camera is properly controlled. The icon stays red if communication with the camera can't be established.
Operation
The RCP should now be operational. A few tips to get started:
- The top row of buttons selects the top menu of the main LCD
- The bottom row selects the submenus which are the second row of labels on the LCD
- The paint menu can be cycled between OFF -> PAINT 1 -> PAINT 2
- The
Menubutton shows some status pages including the IP Address received by DHCP - The left/right arrows on the bottom of the page cycle between cameras
Refer to the RCP Manual.
Software update
We deliver product updates continuously so it is a good idea to get your system up to date at this point. For this, connect the switch to an internet access, a modem, or a 4G access point.
Once the RCP has internet access, it will list the available releases in the Admin tab of the web interface. Clicking on Download Latest will refresh the list. Simply click Select and start on the latest release to activate it: the release name indicates the release date: 20(year).11(month).1(number). The update takes roughly 30 seconds and will automatically upgrade your configuration.
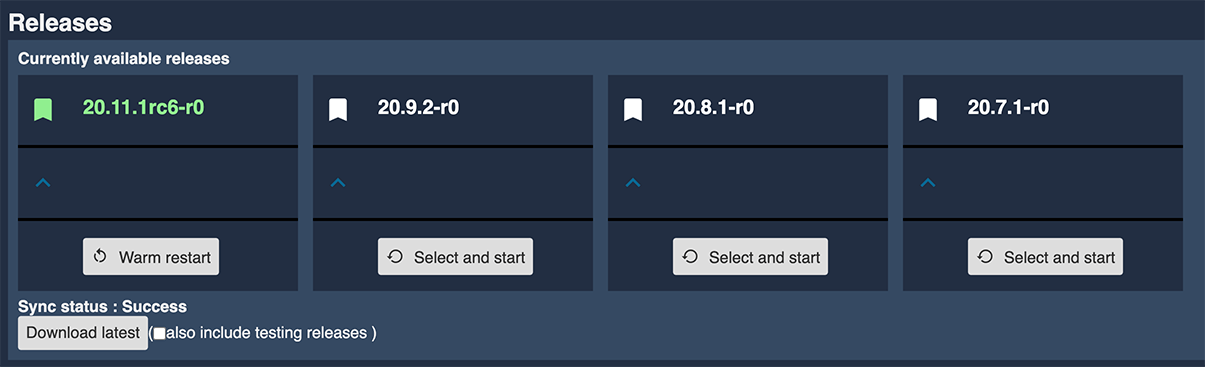
This does update the software running on the RCP but doesn't update the full system. Refer to the Update Manual for more information on keeping the full system up to date.
Advanced Mode
The advanced mode exposes additional serial port parameters for cameras that require them: Dreamchip, Marshall, Proton, and others.
Toggle Advanced Mode
- In the RCP Configuration, click on your camera.
- In the top right corner, click on the dots
... - Click the popup message to toggle advanced mode (the current state is displayed, e.g.
OFF).
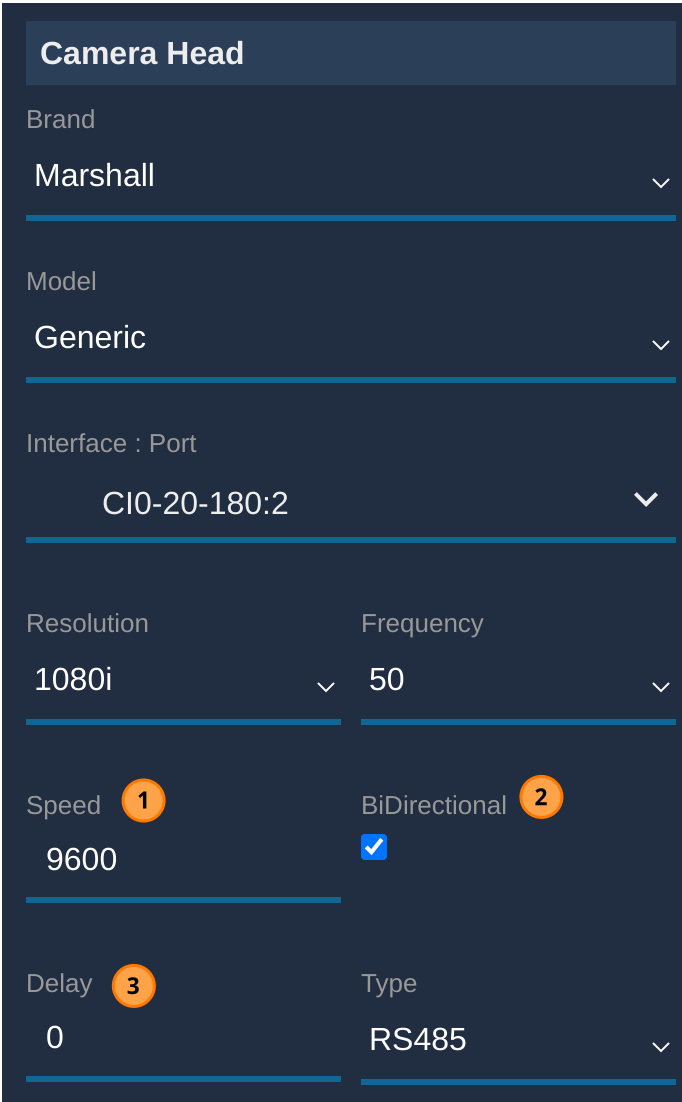
Parameters
| Parameter | Description |
|---|---|
| Speed | Baud rate between the CI0/RIO and the camera. Must match the camera's configured baud rate. |
| Bidirectional | When unchecked, enables unidirectional mode — see below. |
| Delay | Extra delay (in ms) added before the RCP checks for a camera response. Useful for bidirectional links where equipment (e.g. fiber converters, modems) introduces latency in the return path. Has no practical effect in unidirectional mode. |
For CI0 and RIO units, the serial format (RS-485, RS-422, RS-232) can also be changed here. For USB serial dongles, the signaling type is determined by the dongle hardware.
Unidirectional Mode
By default, serial camera communication is bidirectional: the RCP sends a command and waits for the camera to respond within a timeout window. This requires a working return data path on the serial link.
When the return path is unavailable — for example, with RF modems, fiber converters, or other equipment that only relays data in one direction — unidirectional mode can be enabled by unchecking Bidirectional in the advanced panel.
In unidirectional mode:
- The RCP sends commands at the same cadence as bidirectional mode but does not wait for or read any response.
- The camera icon will remain red on the RCP even when the camera is correctly receiving and applying commands. Use the video output to confirm the camera is responding.
- The
Delayparameter has no practical effect.
The following cameras support unidirectional mode: Dreamchip AtomOne / AtomTwo / SSM500, Marshall, Proton, Yushida, Antelope Iron.