Canon XC
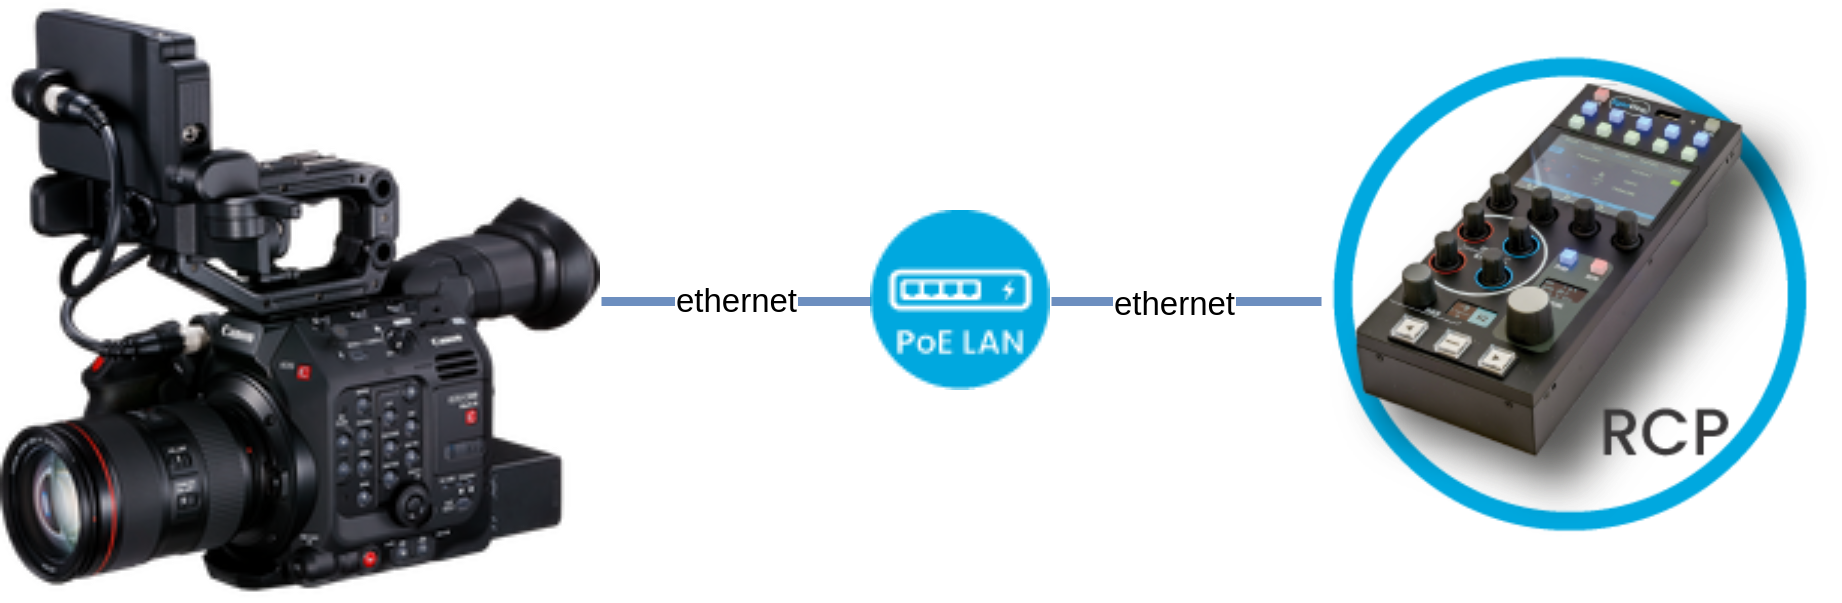
Canon XC is an IP-based control protocol for Canon Cinema EOS cameras that enables full bidirectional shading, tally, OSD, and lens control from a Cyanview RCP. The camera connects to the RCP over Ethernet. Typical use cases include multicam live production, large-sensor shading, and remote studio setups.
Supported Models
- C70
- C80
- C300 Mk3
- C400
- C500 Mk2
- XF605 — see the dedicated Canon XF605 guide for XF605-specific lens ranges and setup
For older Cinema EOS models (C100, C200, C300 Mk1/Mk2, C500 Mk1, C700, XF200/205/300/305/705), use the Canon Remote A protocol instead.
Supported Controls
| Control | Notes | XC |
|---|---|---|
| Iris | Manual and Auto | ✔ |
| ISO / Gain | ✔ | |
| Shutter | ✔ | |
| Variable ND | ✔ | |
| White Balance | R/B and color temperature | ✔ |
| Black / Pedestal | R/B, master black, black gamma | ✔ |
| Gamma | ✔ | |
| Detail | ✔ | |
| Knee | ✔ | |
| Saturation | ✔ | |
| Denoise | ✔ | |
| Tally | ✔ | |
| Menu / OSD | ✔ | |
| Lens | Zoom, Focus | ✔ |
| Record | — |
Advanced shading controls (detail, knee, saturation, etc.) require the camera's Custom Picture profile to be set to BT.709 Standard Color Space and the profile must not be protected. See Camera Configuration below.
Connection
The Canon XC cameras connect over IP/Ethernet. Connect the camera's Ethernet port to the same network as the RCP using a standard Ethernet cable.
If the camera IP is not in the range 10.192.0.0/16, follow this guide to configure the RCP to reach the camera.
Configuration
Camera Configuration
You need to configure a static Ethernet IP and enable the XC protocol on the camera.
Network / XC Protocol Setup
Follow the wizard at Network Settings > New Conn. Settings (Wizard):
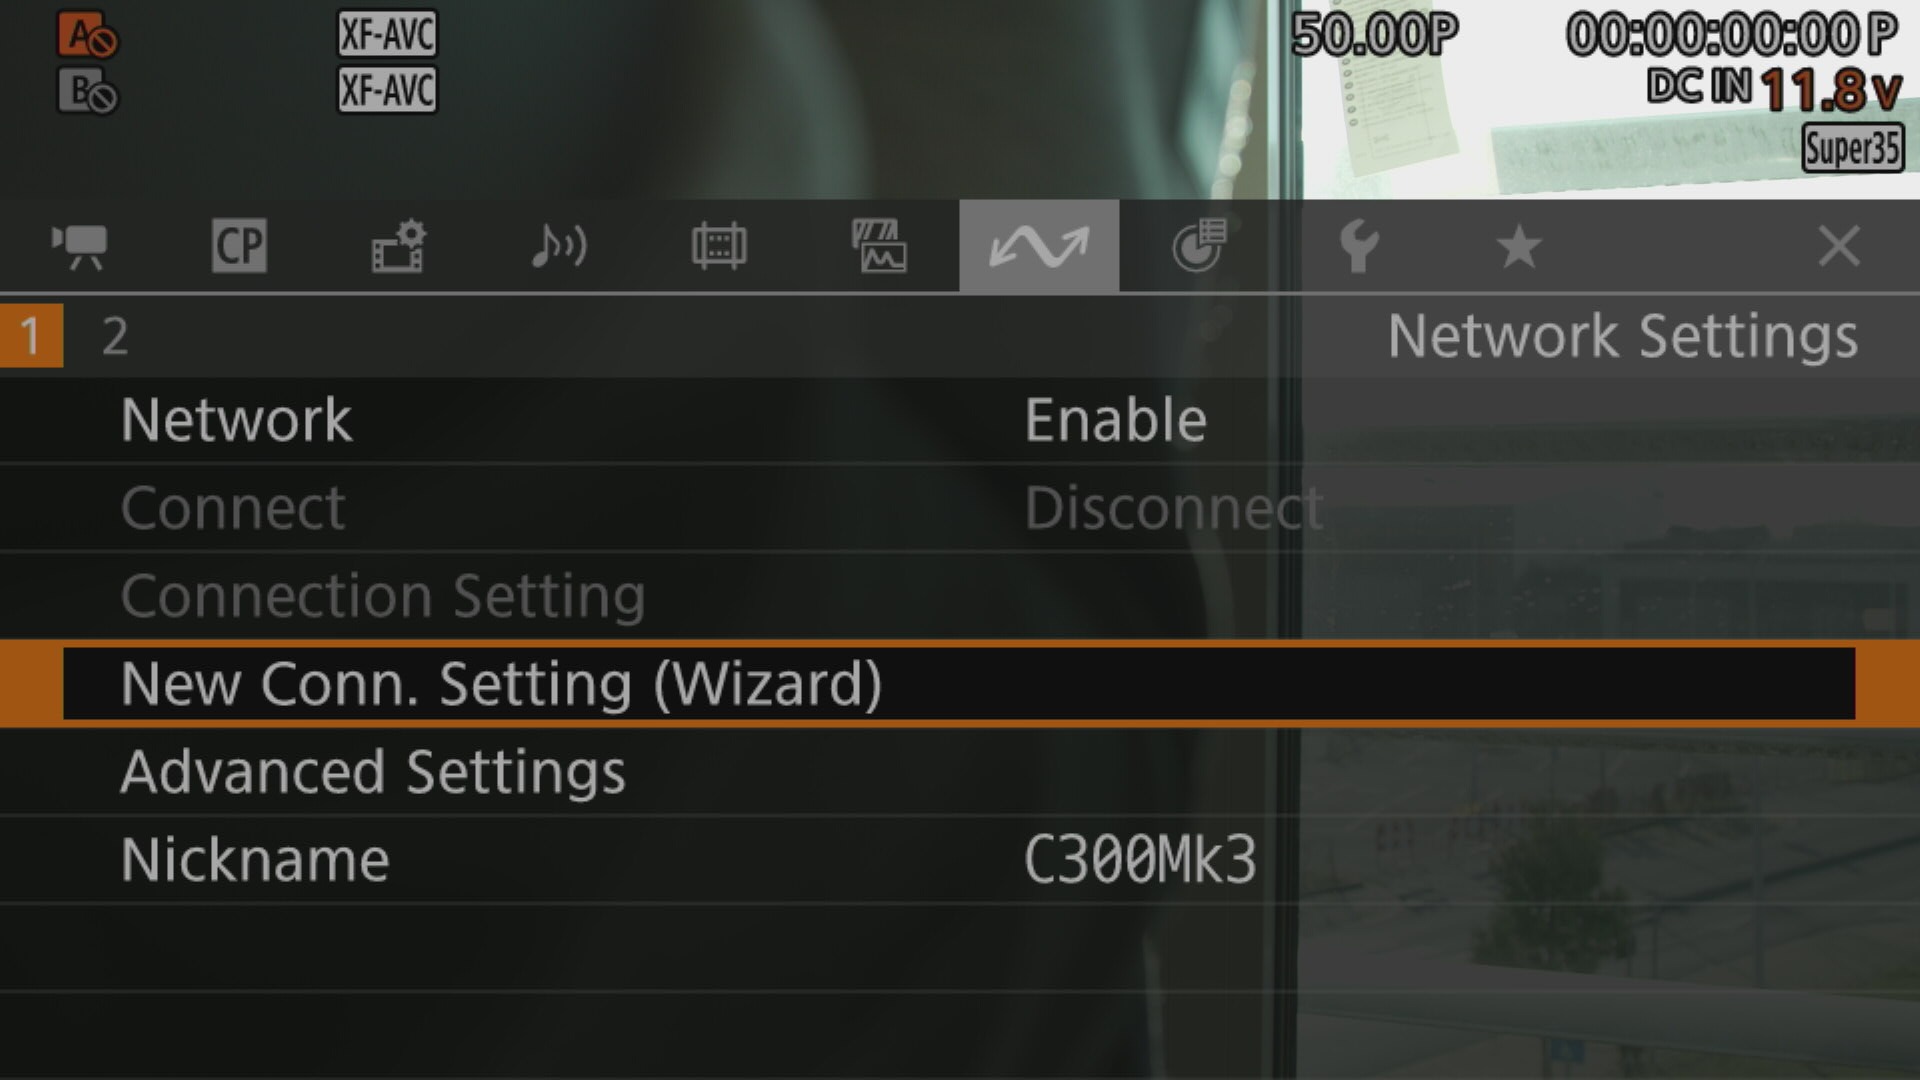
- For
Select Function, chooseXC Protocol
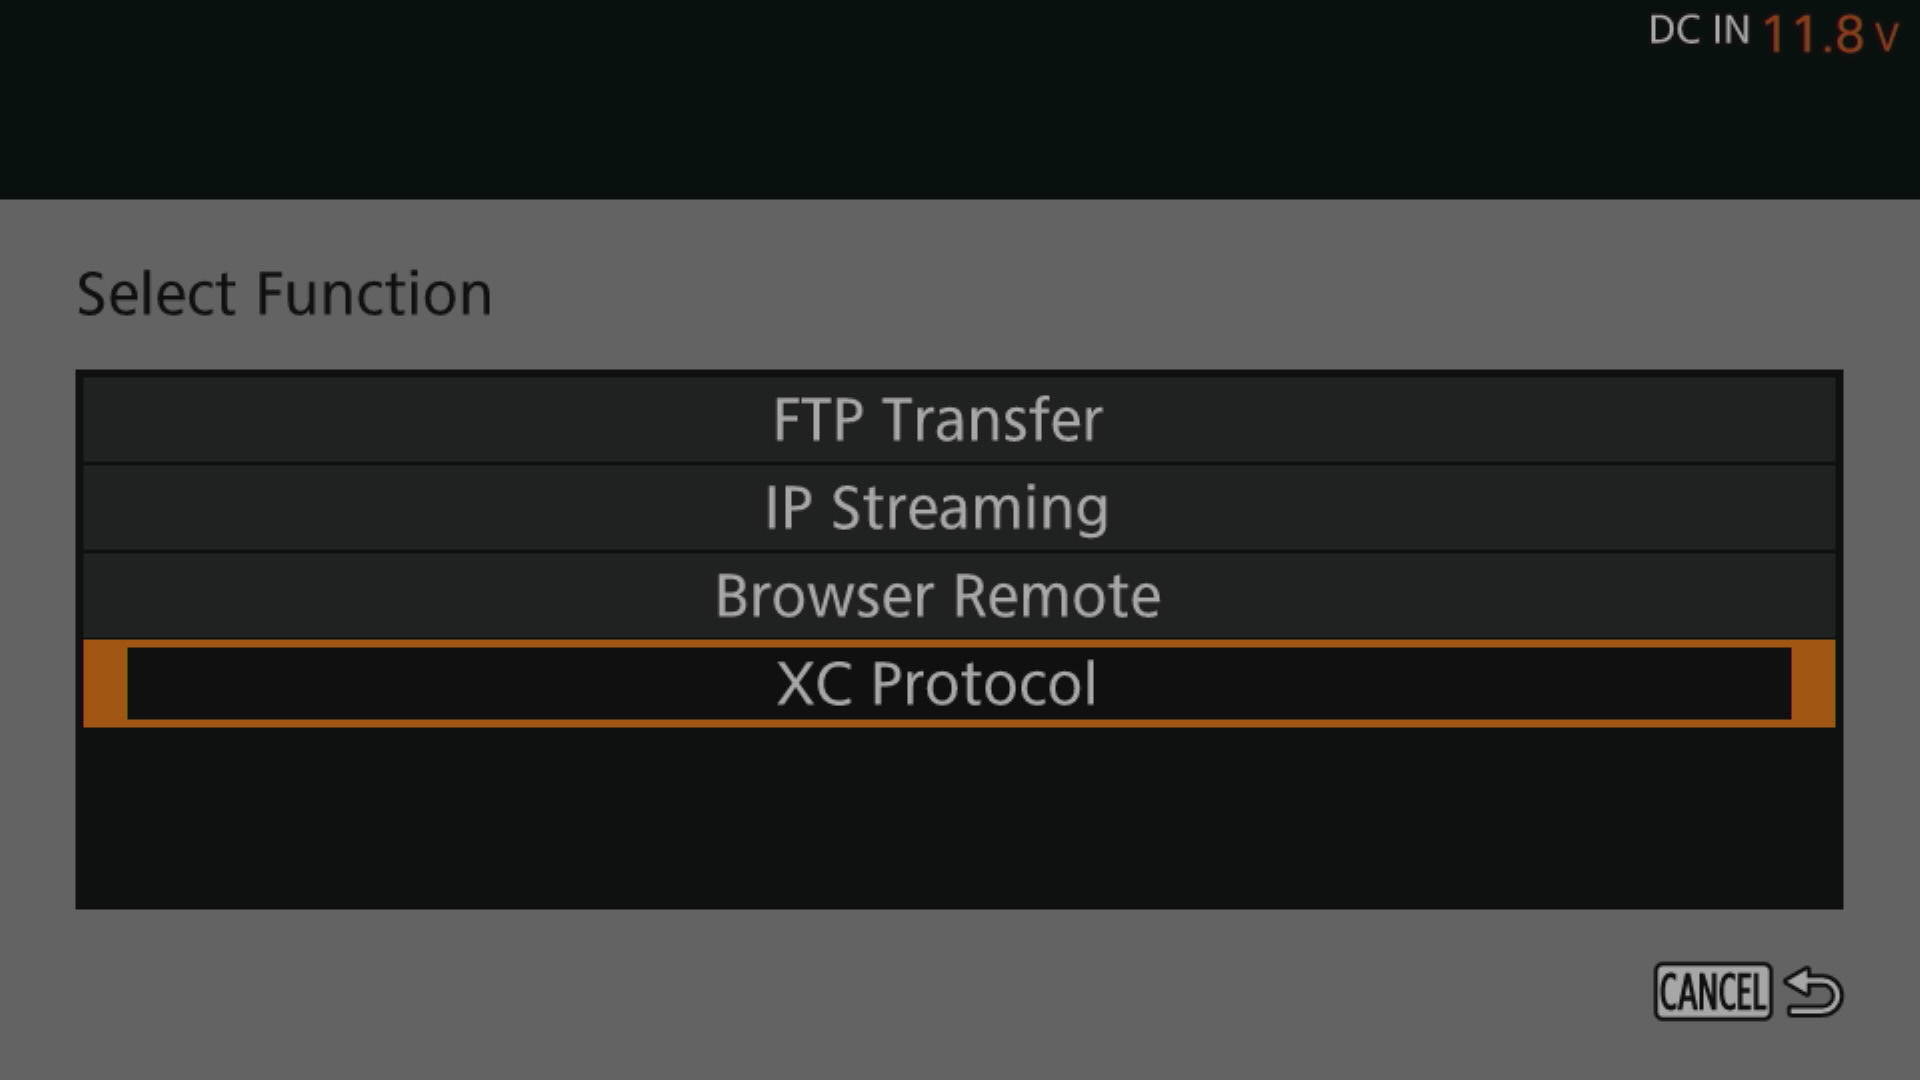
- For
Communication Settings, chooseCreate New Comm. Setting - For
Network Type, chooseEthernet - For
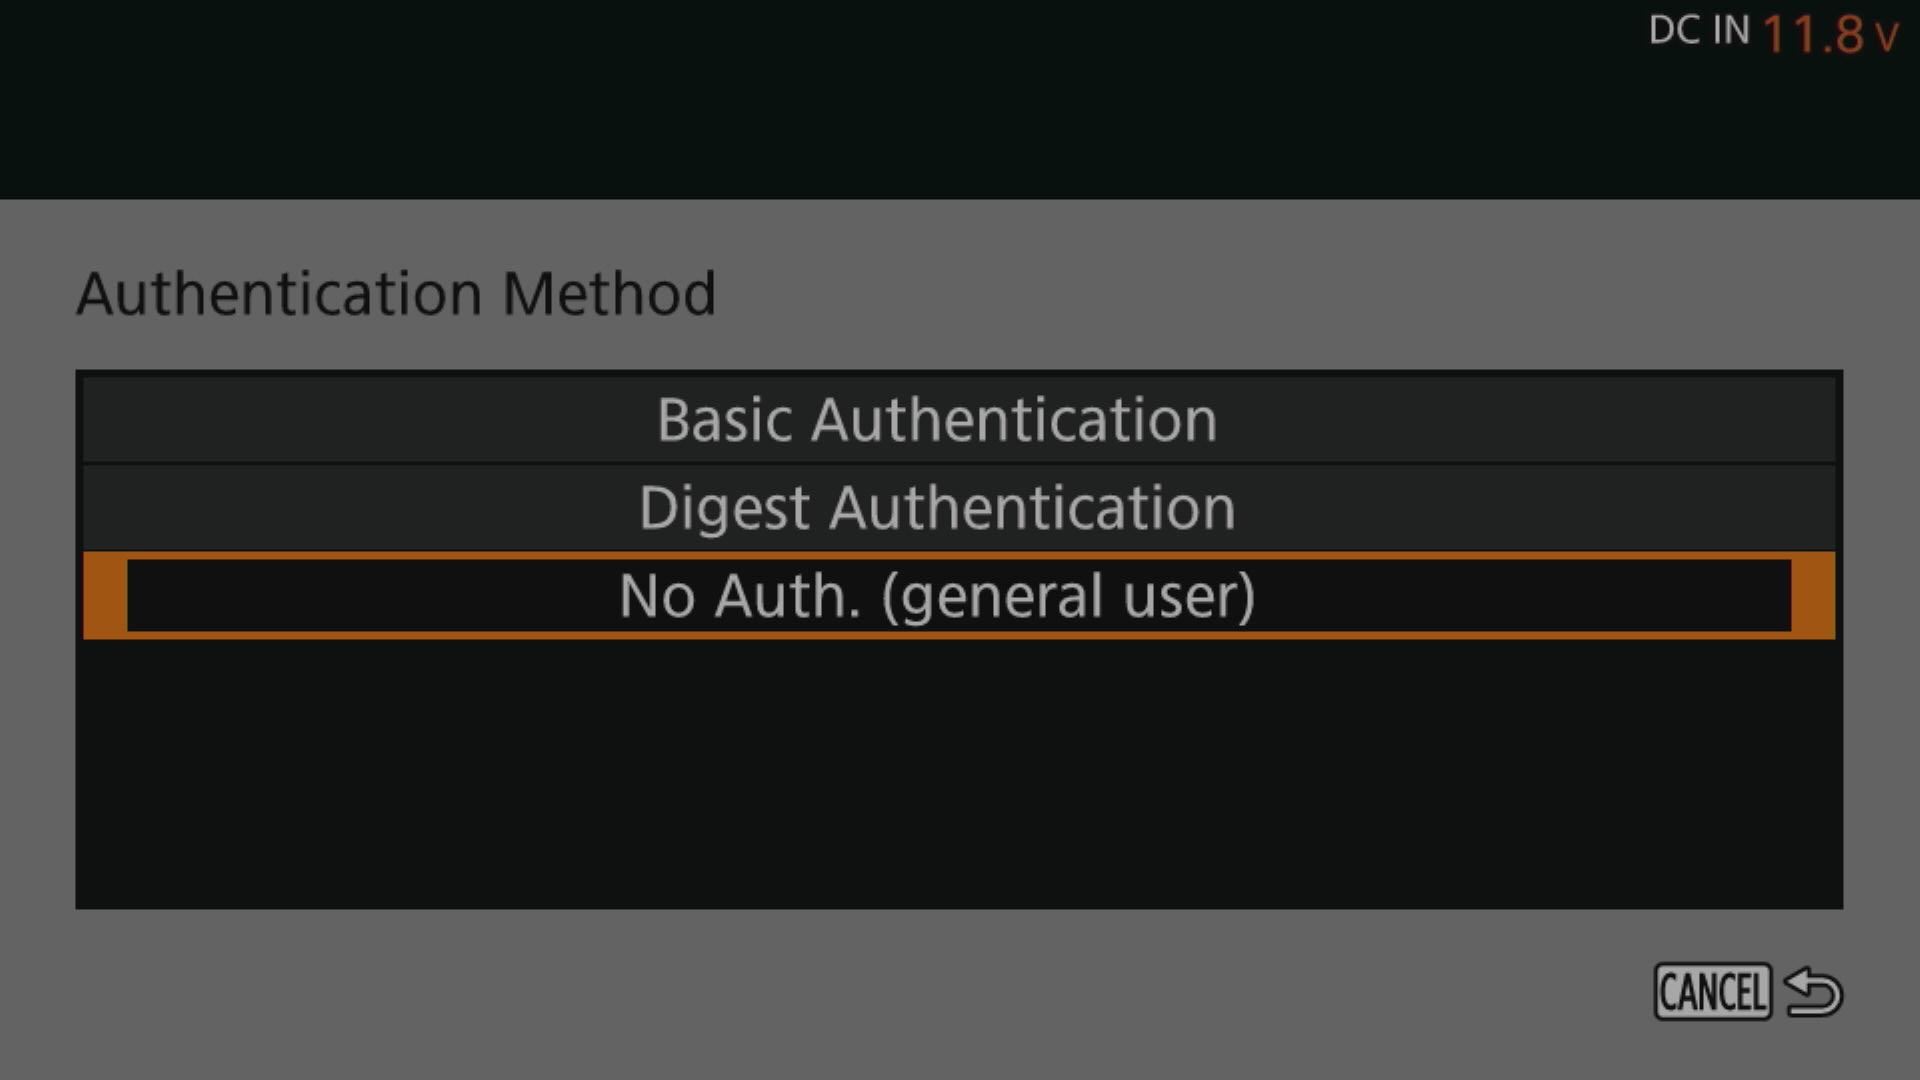
Setting Method, chooseSetup with Network Connection - For
IP Address Settings (IPV4), chooseManual Setting - Enter a valid static IP address
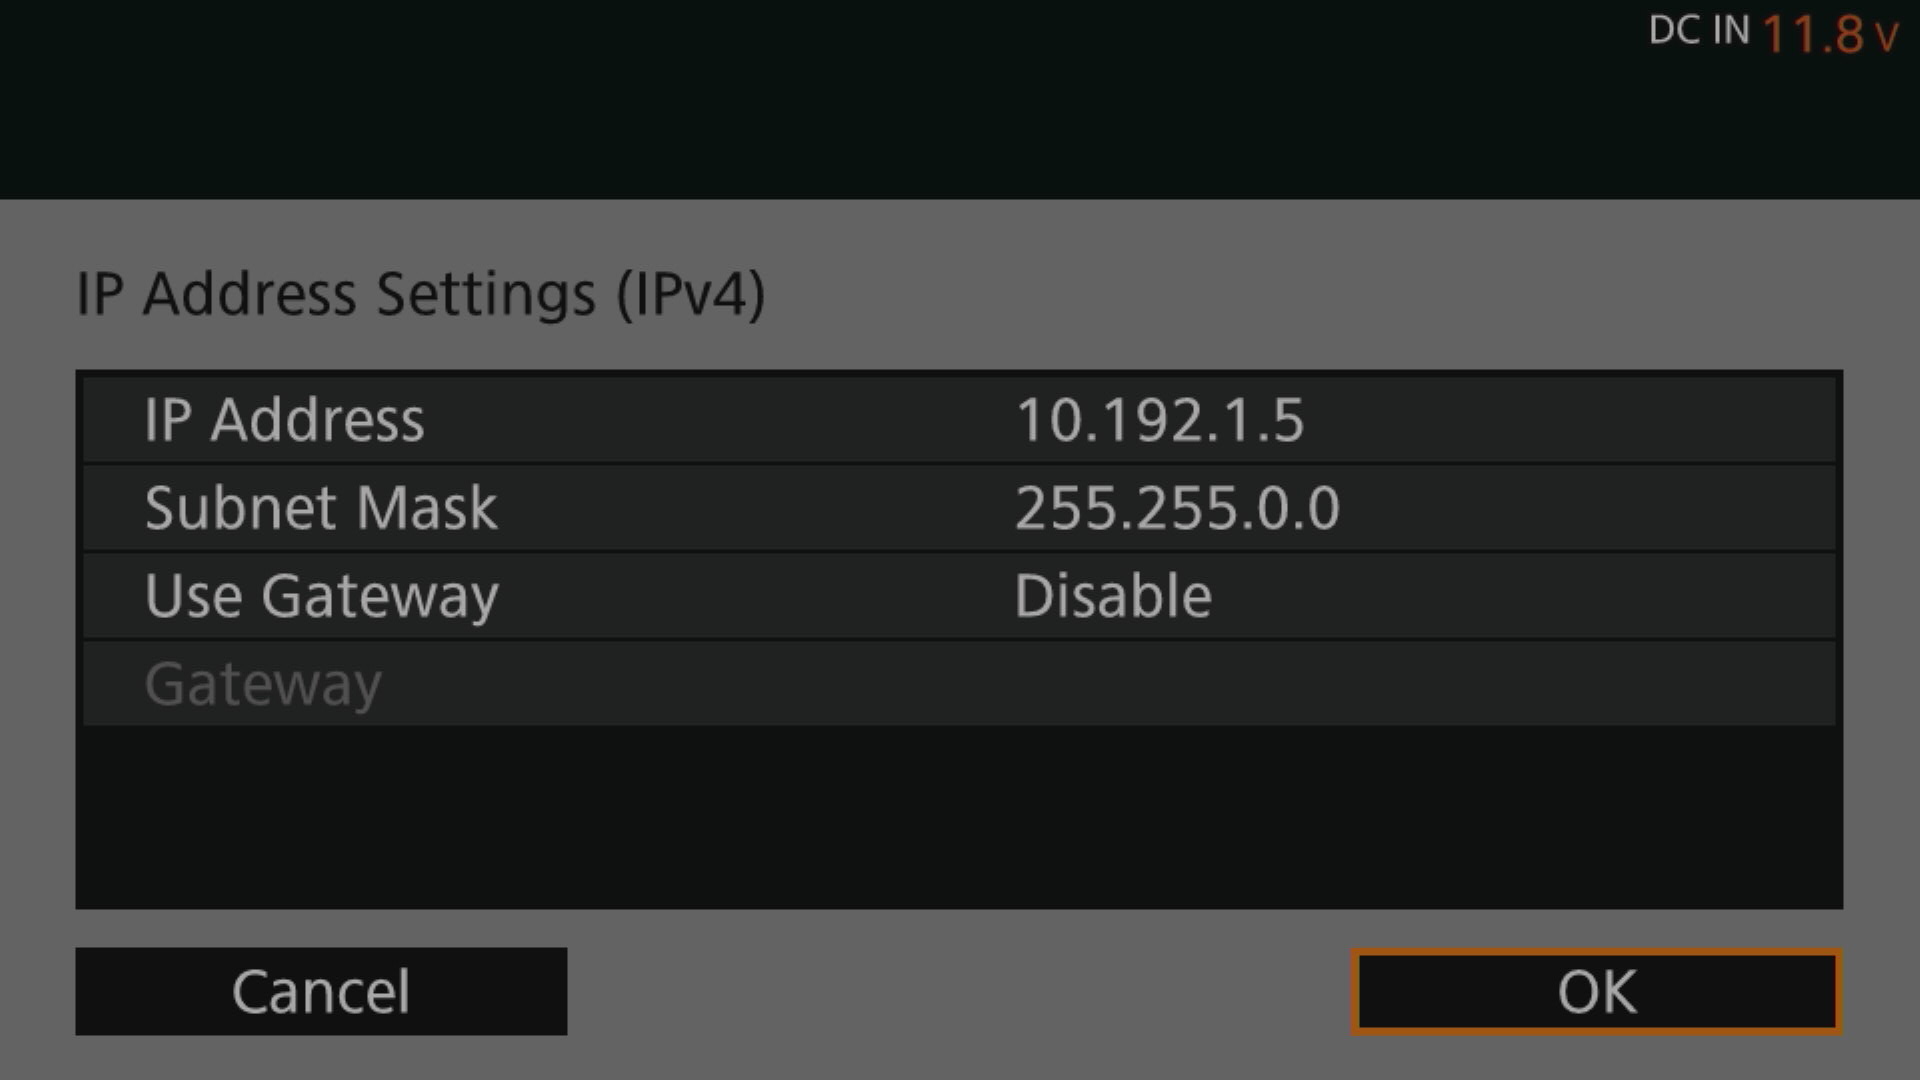
- For
XC Protocol, chooseCreate New Func. Setting
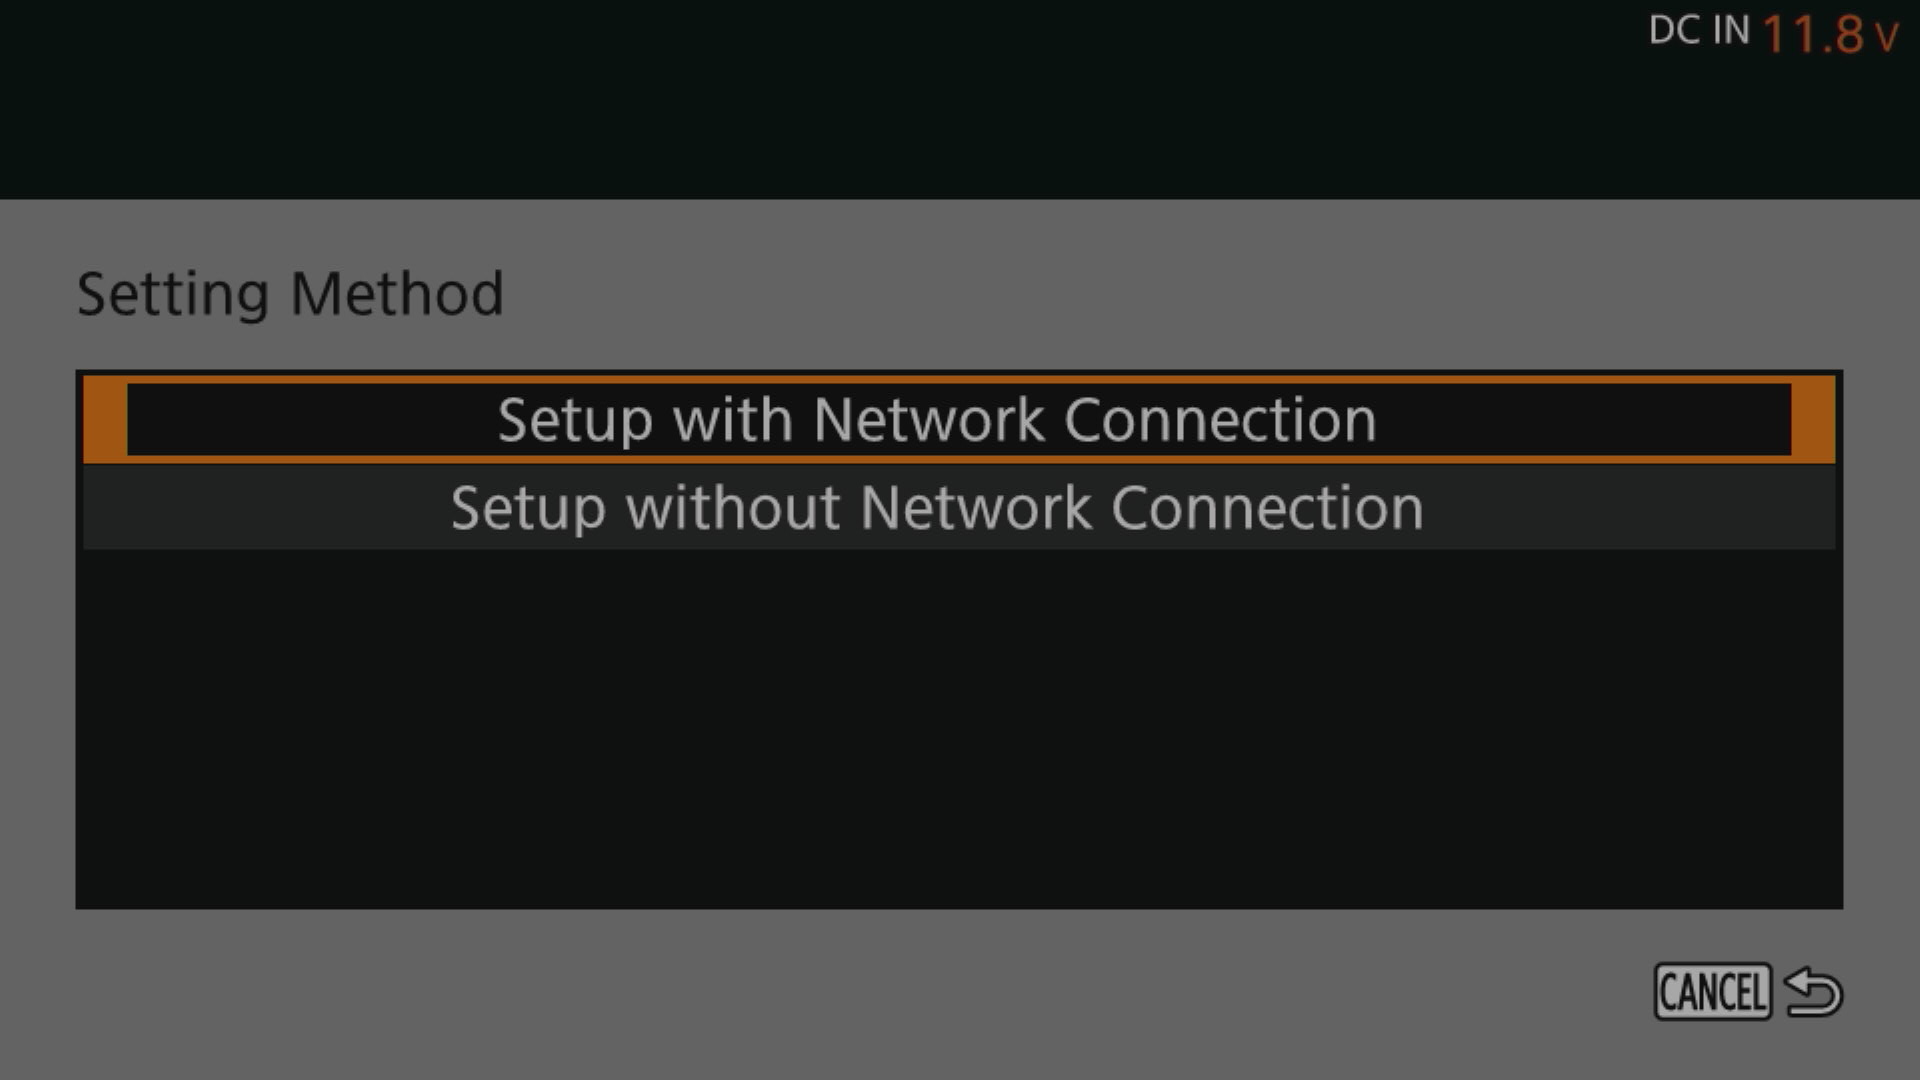
- For
Authentication Method, chooseNo Auth.
Custom Picture Profile (for advanced shading)
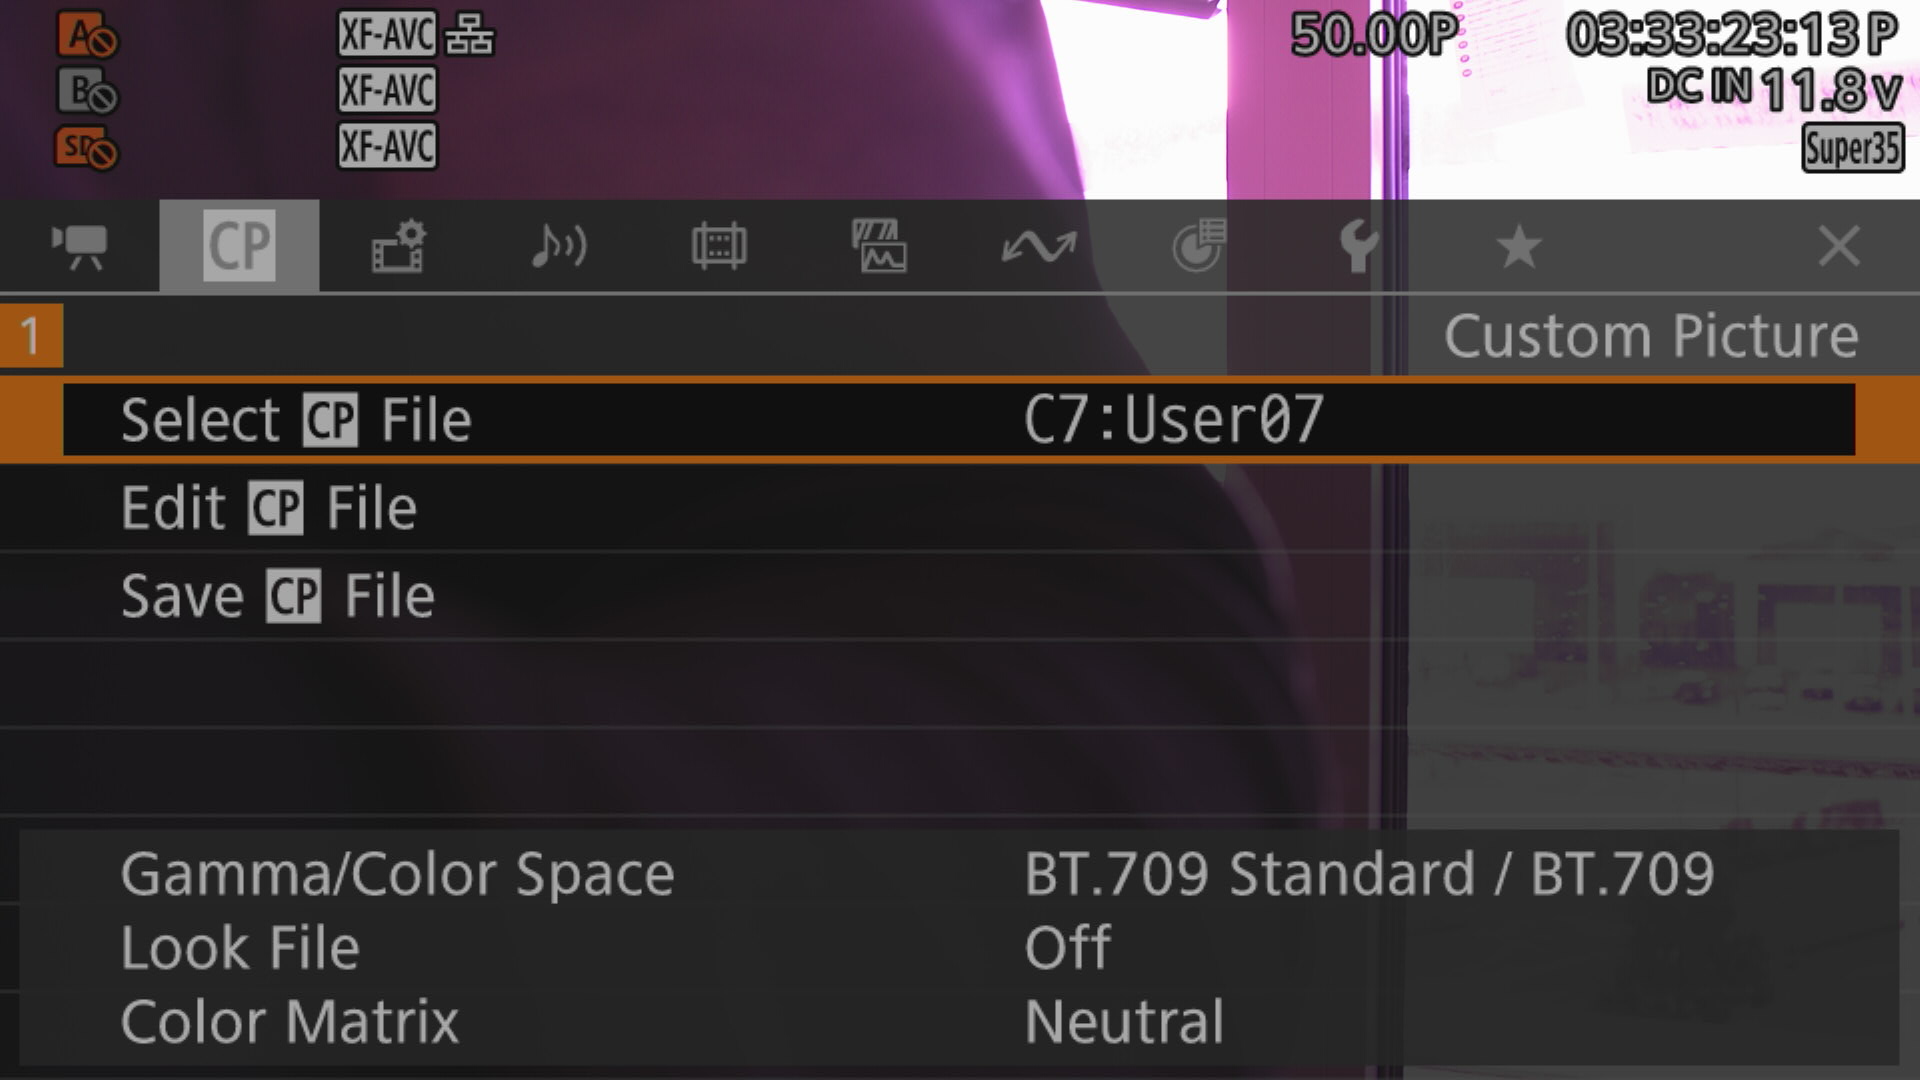
In the Custom Picture menu:
- Select
User XX(any user slot) - Edit the profile and ensure
Color Spaceis set toBT.709 Standard
RCP Configuration
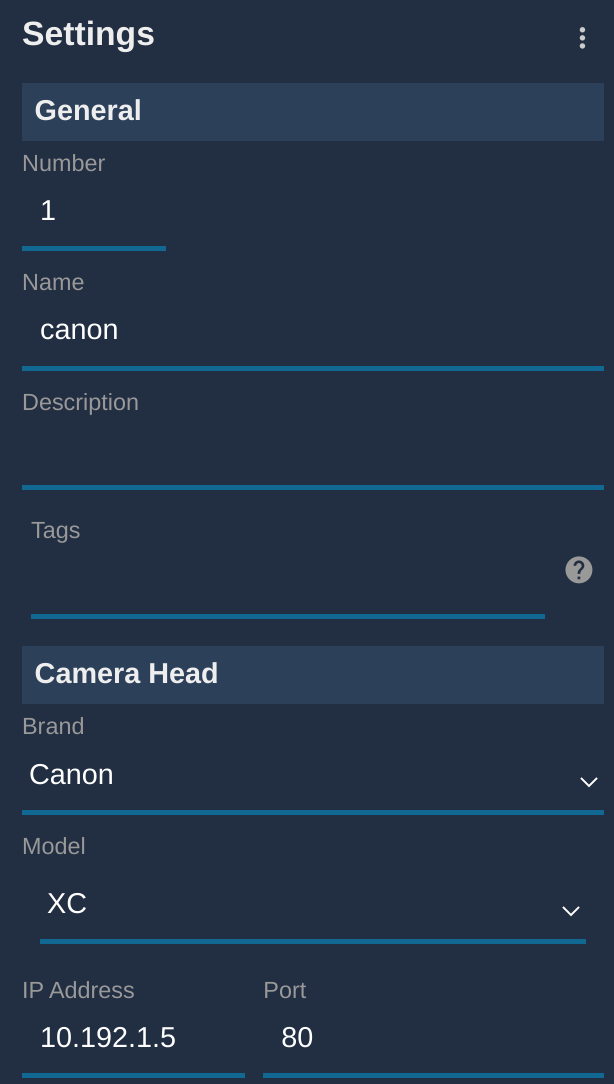
Add the camera as an IP camera. Use brand Canon and model XC, then enter the camera IP address.
Troubleshooting
Camera icon stays RED / camera not detected
Check in this order:
- Verify camera network settings — confirm the static IP is correctly set and the XC protocol is enabled (see Camera Configuration above). A camera firmware update often resets these settings.
- Ping the camera from a computer — set the computer to the same IP range and ping the camera IP to confirm basic network connectivity.
- Ping the RCP from the same computer — confirms the RCP and camera are on the same subnet.
- Check the RCP IP — the RCP must have an IP address in the same range as the camera.
- Power cycle — restart the camera and retry.
- Check the cable — try a different Ethernet cable or switch port.
No paint / shading control
- Ensure the camera is not in
ATW(Auto White Balance) mode. - Ensure the active Custom Picture profile is set to
Unprotect:- Open menu (can be done from the RCP)
- Navigate to
CP - Click on
Edit CP File - Ensure
Protectis set toUnprotect
A specific parameter is not controllable
- Confirm the Custom Picture profile has
Color Spaceset toBT.709 Standard— some advanced controls (detail, knee, etc.) are unavailable under other color spaces. - Confirm the parameter is not set to
Autoon the camera.